

Admin Setup Guide
Kumo uses Groups, Projects, and Identities to organize people, work, and data access. A Group brings together a team and the reusable external identities available to its Projects. An identity is a saved authentication configuration that Kumo uses to access an external data source. A Project is a workspace within a Group for the tables, graphs, queries, jobs, and uploads that support one piece of work.
Each Project belongs to one Group and keeps its assets separate from other Projects. Use this page if you administer a workspace and need to add users or control their access to Projects. For identity configuration, continue to Create and Manage Identities.
Groups and Projects apply to deployments that have role-based access control (RBAC) enabled. To work with them from the Kumo RDL SDK instead of the UI, see Groups, Projects, and RBAC.
Roles and permissions
Kumo has two roles: Admin and User. Admins decide who can access what, and Users build models within the access they have been granted. Find your role in the table to see what you can do.
Admin Setup Guide
Use these steps to give users access to the Groups and Projects where they work, then configure identities that let those Projects connect to external data.
1. Add users to your workspace
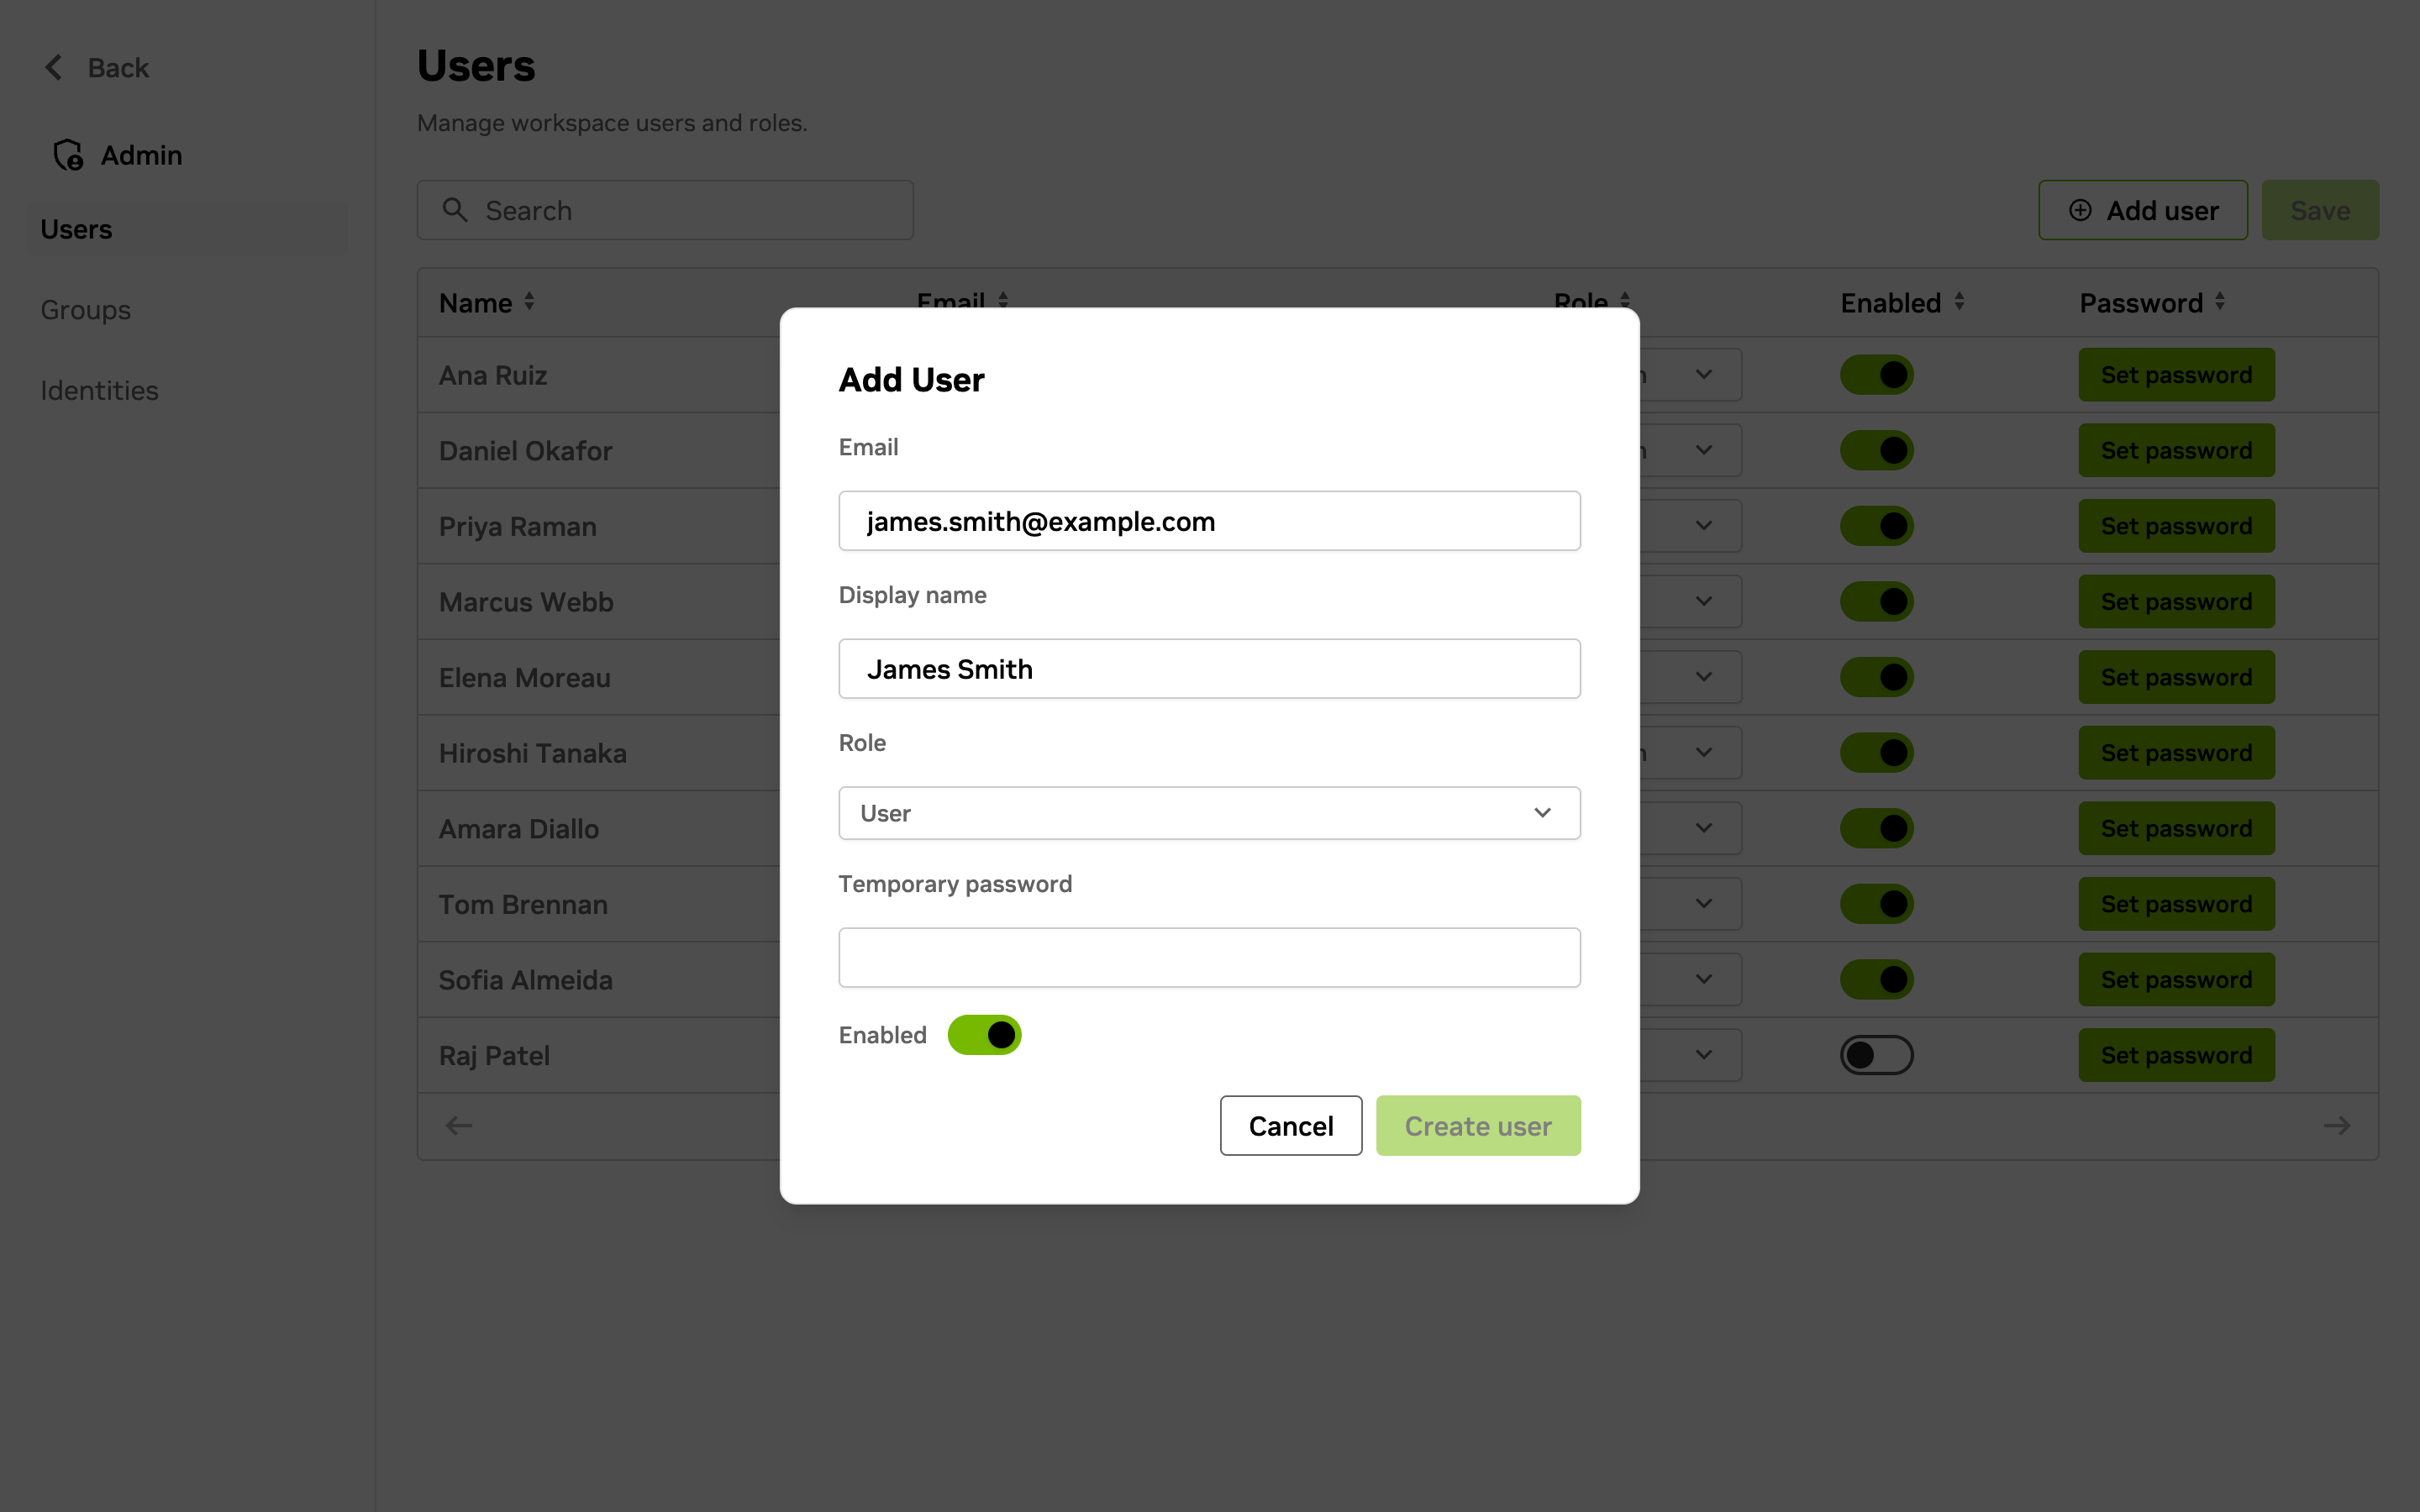
Use the Users tab in the Admin panel to create and manage workspace accounts.
- Open Admin, then select Users.
- Select Add user, enter the user’s Email, Display name, and Role, then select Create user.
- For password sign-in workspaces, set a Temporary password when creating the user, or select Set password for an existing user.
- Share your workspace sign-in URL and the temporary password with the user through your organization’s approved channel. Kumo does not send an email invitation from this flow.
- When the user signs in with the temporary password, Kumo asks them to create a permanent password before they can access their account.
2. Add users to Groups
Groups control which workspace users can work together and which identities their Projects can use.
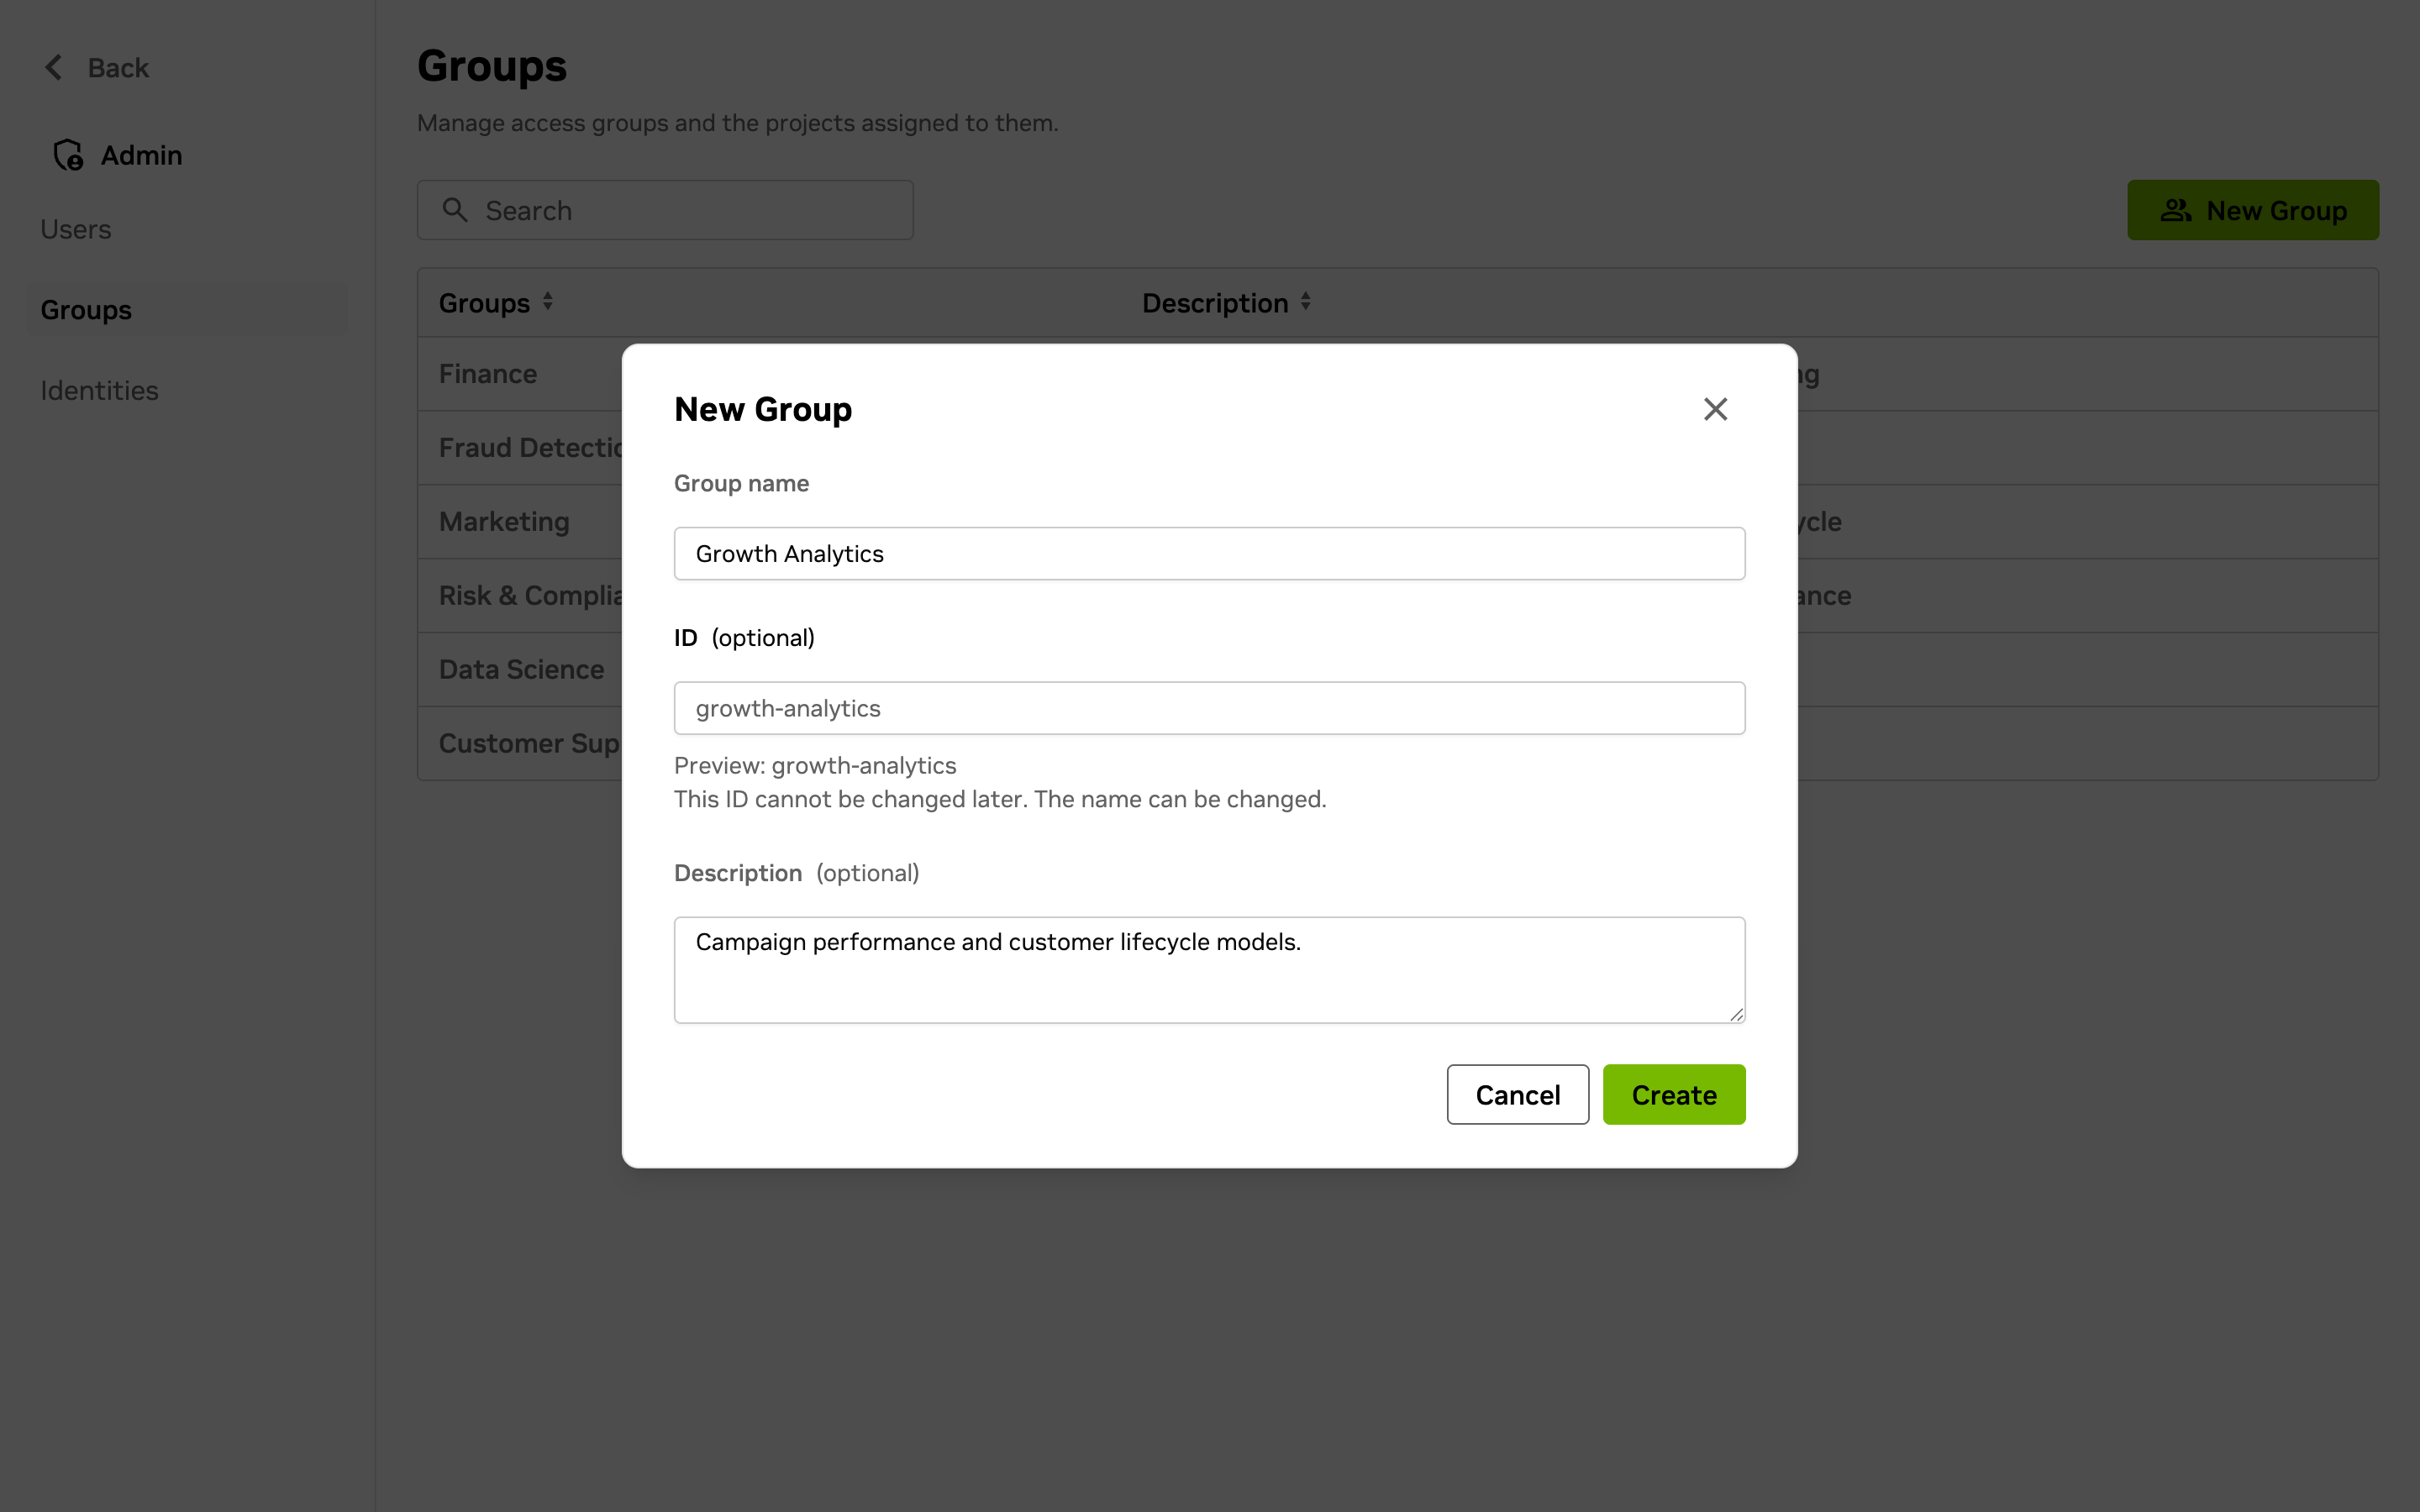
Create a Group
- Open Admin, then select Groups.
- Select New Group.
- Enter a Group name and, if useful, an ID and optional Description, then select Create. Kumo generates the ID from the Group name, and the ID cannot be changed after creation.
Edit a Group
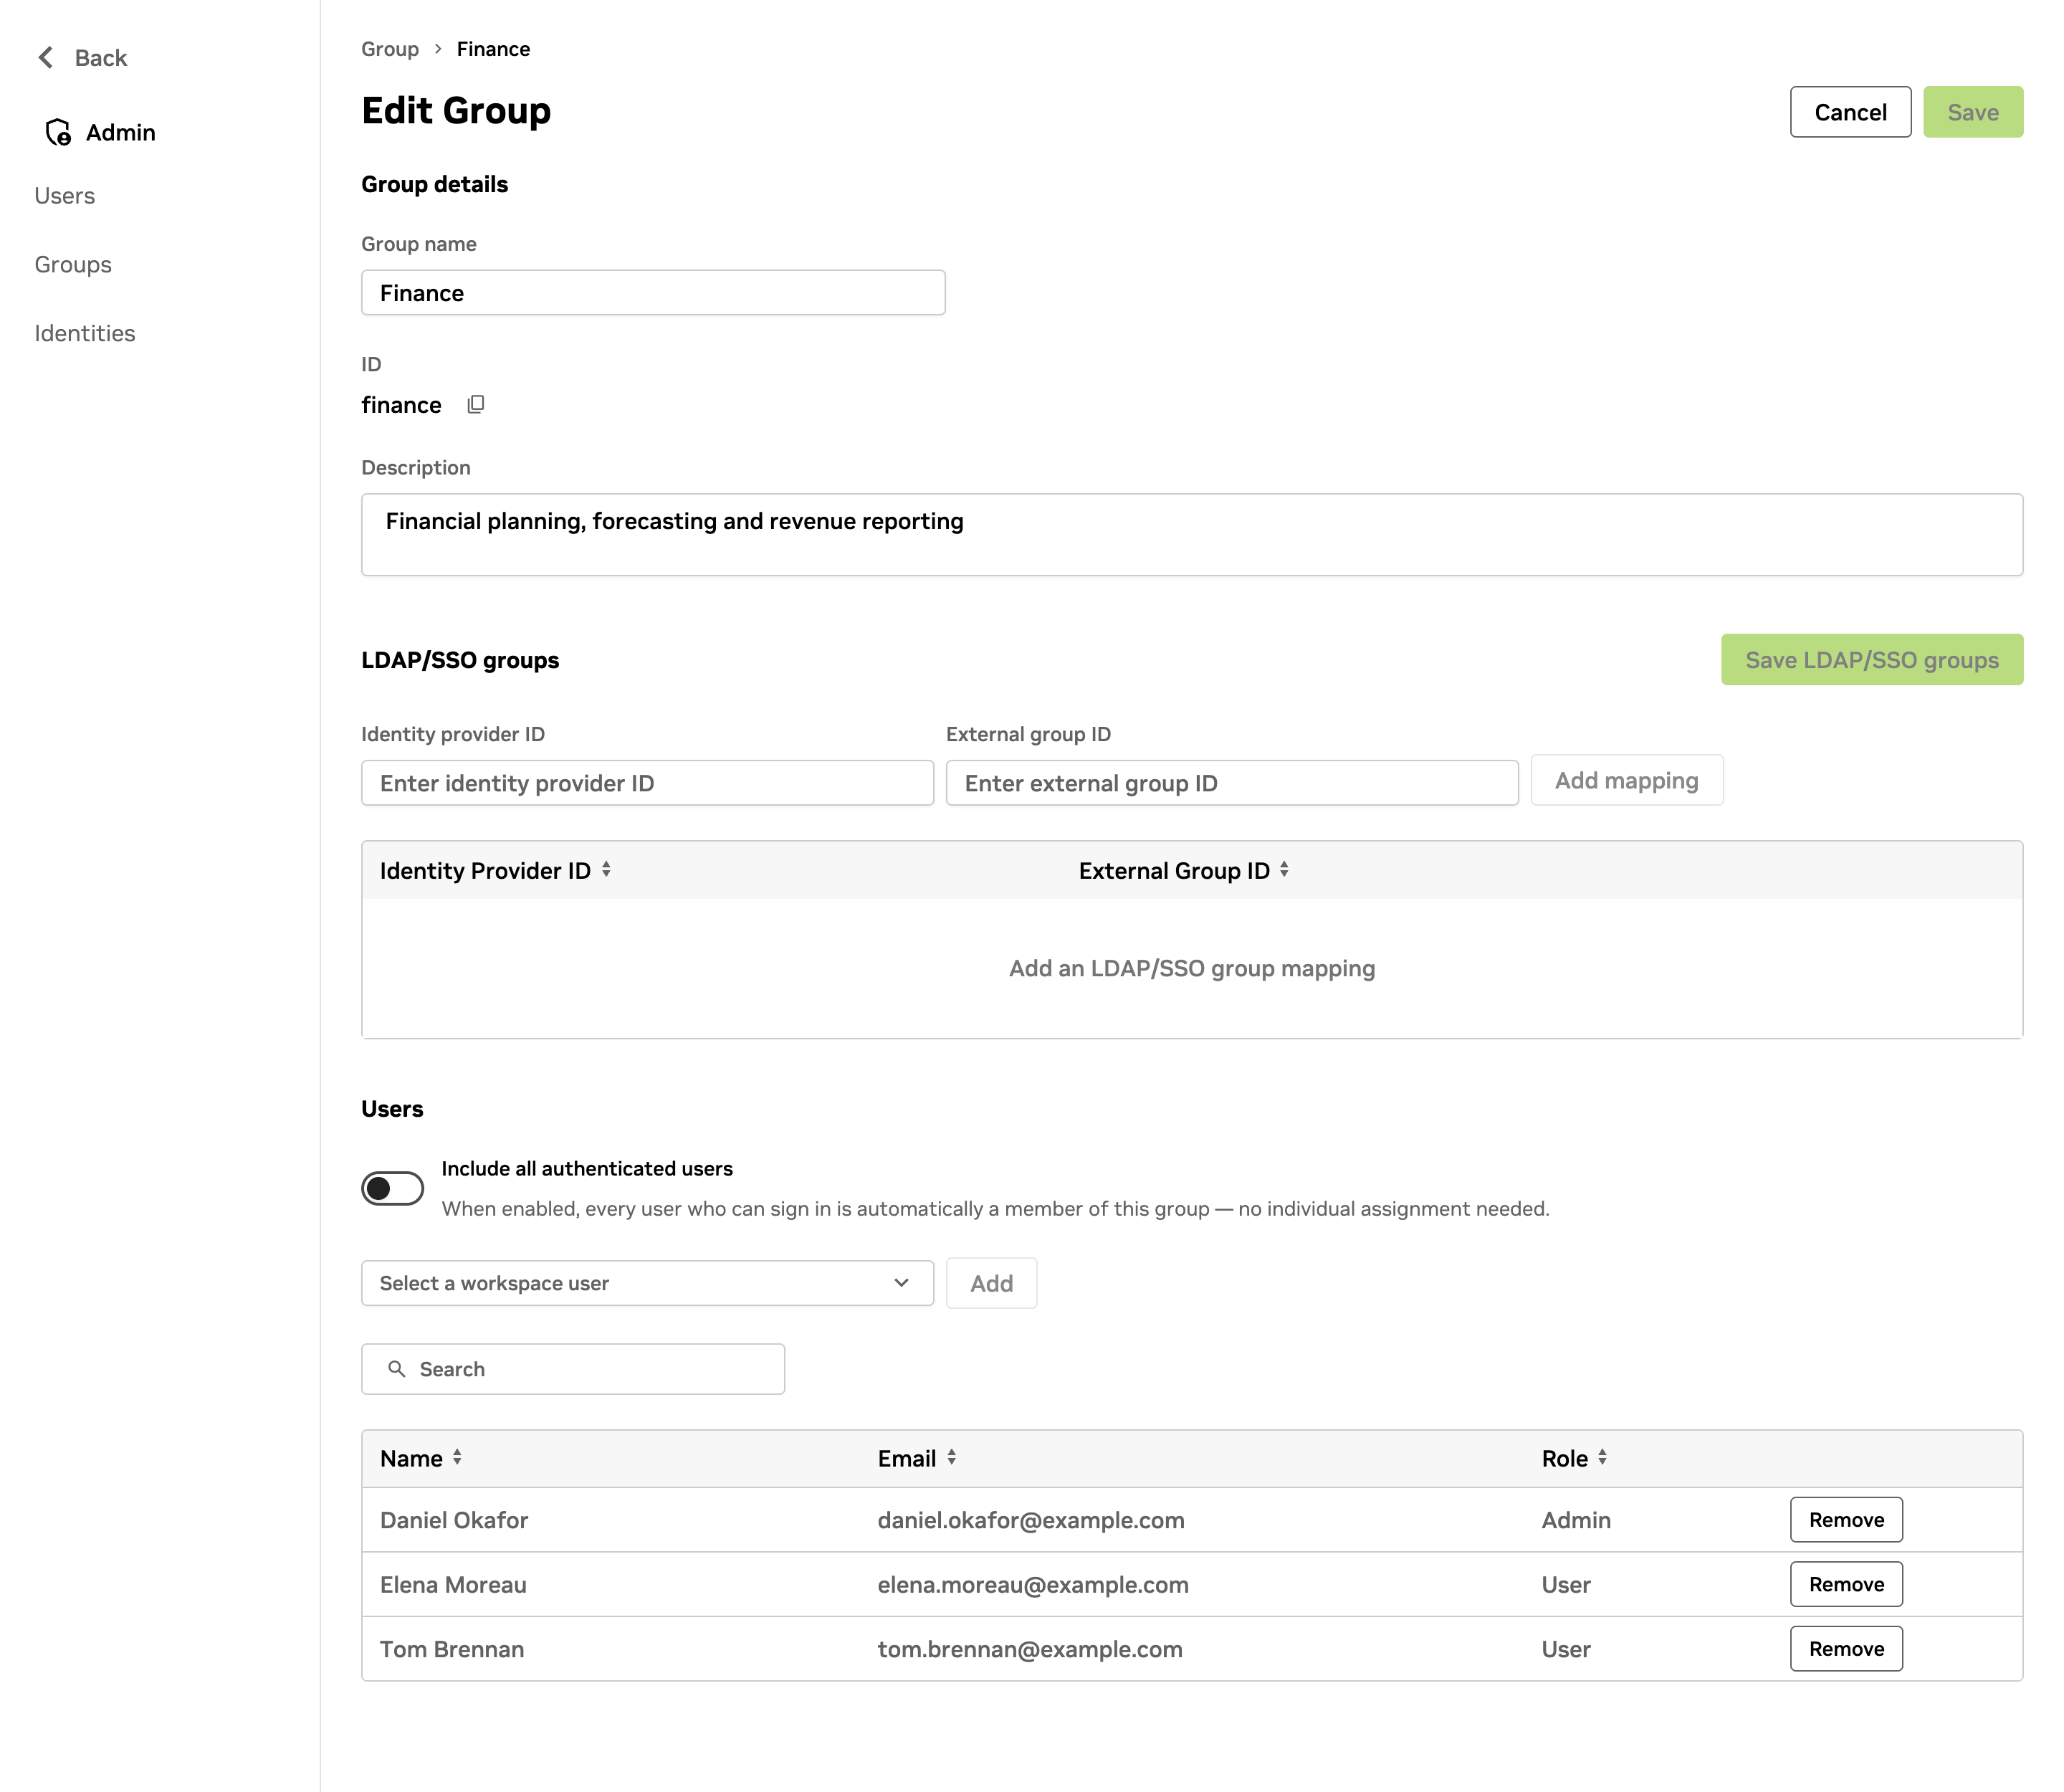
Select a Group from the Groups list to open its settings.
You can grant membership in three ways:
- Map an LDAP/SSO group. In the Group’s LDAP/SSO groups section, enter the Identity provider ID and External group ID, select Add mapping, then select Save LDAP/SSO groups. Members of that mapped external group can access the Kumo Group.
- Add individual workspace users. In the Group’s Users section, select an active workspace user, select Add, then save the Group.
- Include all authenticated users. Turn on Include all authenticated users, then save the Group to make every user who can sign in a member without individual assignment. While this rule is on, the individual-user list takes effect only after you turn the rule off. This option is not shown for OIDC sign-in workspaces.
LDAP/SSO connections are managed from the selected Group, not from the Identities tab.
Next steps
Continue to Create and Manage Identities to configure reusable external credentials for data connectors.