Video Summarization Workflow#
The Video Summarization Workflow enables analysis and summarization of video content without being constrained by the standard VLM context window limitations, allowing for the analysis of long-form video content.
Capabilities
Summarize uploaded videos that are longer than the standard VLM context window.
Generate reports for one or more uploaded videos.
Configure live streams for caption generation (experimental).
Summarize live streams over a time range (experimental).
Generate reports for live streams over a time range (experimental).
Ask questions over stored stream captions and events (experimental).
Review extracted events in the Kibana dashboard.
Use Cases
Automated incident report generation
Event detection in extended video archives
Shift summaries and daily activity reports
Question answering over captioned live streams (experimental)
Technical Approach
Standard VLMs are limited to processing short video clips, usually less than 1 minute, depending on the number of subsampled frames and level of detail required. This workflow uses the Video Summarization microservice to segment longer videos, analyze each segment with a VLM, and synthesize the results into coherent summaries with timestamped events. For live streams, the workflow can store VLM captions and events so the agent can answer later questions or generate stream summaries. Stream summary and stored-caption Q&A are experimental.
Estimated Deployment Time: 15-20 minutes
The following diagram illustrates the video summarization architecture:

Key Features of the Vision Agent with Video Summarization:
Generate narrative summaries for uploaded video files.
Generate reports for a single uploaded video or for multiple uploaded videos in one request.
Formulate timestamped highlights based on user-defined events.
Configure live streams for caption generation with a monitoring scenario, events, and optional objects of interest (experimental).
Summarize live streams, generate reports, and answer questions using stored captions and events (experimental).
Return results through the AI agent interface.
What’s being deployed#
VSS Agent: Agent service that uses a configured LLM endpoint to route requests and orchestrate tool calls to VSS microservices and model endpoints (LLM/VLM NIMs) to answer questions and generate outputs
VSS Agent UI: Web UI with chat, video upload, and different views
VSS Video IO & Storage (VIOS): Video ingestion, recording, and playback services used by the agent for video access and management
Nemotron LLM (NIM): LLM inference service used for reasoning, tool selection, and response generation
Cosmos Reason 2 (NIM): Vision-language model with physical reasoning capabilities
RTVI-VLM: Real-Time Video Intelligence VLM service used by the Video Summarization profile for VLM calls
VSS Video Summarization: Microservice for segmenting and summarizing video content (uploaded files of any length, plus RTSP live streams)
Kafka: Message bus used for stream caption and summary events
ELK: Elasticsearch, Logstash, and Kibana stack for storing and reviewing Video Summarization events and captions
Phoenix: Observability and telemetry service for agent workflow monitoring
Prerequisites#
Before you begin, ensure all of the prerequisites are met. See Prerequisites for more details.
Deploy#
Note
For instructions on downloading sample data and the deployment package, see Download Sample Data and Deployment Package in the Quickstart guide.
With Agent Skills#
Step 1: Deploy the Agent#
Use VSS Agent Skills from an agent such as Claude Code, Codex, or NemoClaw to deploy and operate the video summarization workflow.
First, install the vss-deploy-profile skill as described in Agent Skills and make it
accessible to your agent. The host must meet the same deployment requirements listed above (supported GPU/hardware for that profile)
and must meet the Prerequisites.
The vss-deploy-profile skill will choose the <platform> and <mode> to match your system, as detailed in Development Profile GPU Requirements.
Refer to the requirements table for valid platform and mode combinations compatible with your hardware.
Deploy the VSS video summarization profile (lvs).
What the agent does:
Loads the
vss-deploy-profileskill and detects the repository, GPU hardware, and host networking values.Validates required credentials (such as
NGC_CLI_API_KEY) and prompts you if any are missing.Selects the
lvsprofile and a platform and mode that fit your hardware, then builds the deployment configuration.Reviews the configuration with you, then deploys the containers.
Waits until all services are healthy and returns the agent UI endpoint.
Step 2: Upload a Video#
To operate the video summarization and report generation workflow from your agent, install the vss-manage-video-io-storage, vss-summarize-video, and vss-generate-video-report skills as described in Agent Skills.
Your agent can then upload videos, summarize them, and generate reports through VSS with natural-language prompts, without requiring manual interaction with the UI.
Upload a video through the vss-manage-video-io-storage skill.
Upload warehouse_sample.mp4 to VIOS.
What the agent does:
Loads the
vss-manage-video-io-storageskill and verifies that VIOS is reachable.Uploads the video file to VIOS.
Confirms that VIOS lists the new video.
Step 3: Summarize a Video and Generate Reports#
Ask your agent to summarize an uploaded video or generate a structured report for it. The vss-summarize-video skill handles direct summary requests through the Video Summarization microservice (with a VLM fallback). For report requests, the vss-generate-video-report skill uses the LVS summarization path when the lvs profile is ready and renders the result into a report template.
Summarize an Uploaded Video#
Summarize warehouse_sample with scenario 'warehouse monitoring' and events ['boxes falling', 'forklift stuck', 'person entering restricted area'].
Summarize warehouse_sample using the default scenario and events.
What the agent does:
Loads the
vss-summarize-videoskill and probes the Video Summarization service readiness, routing to the LVS microservice when it is ready and to the VLM fallback otherwise.Resolves the clip URL, stream ID, and timeline through the
vss-manage-video-io-storageskill.Collects the monitoring scenario, events, and optional objects of interest, or uses defaults when told to run autonomously.
Calls the Video Summarization service with the clip URL, scenario, events, and chunking parameters.
Renders the narrative summary and timestamped events.
Generate a Report#
Generate a report for warehouse_sample with scenario 'warehouse monitoring' and events ['boxes falling', 'forklift stuck', 'person entering restricted area'].
Generate a report for warehouse_sample using the default scenario and events.
What the agent does:
Loads the
vss-generate-video-reportskill and selects the per-clip report mode.Detects that the
lvsprofile is deployed (the Video Summarization service is ready), so it delegates to thevss-summarize-videoskill for the summary and timestamped events instead of the VLM-direct path.Resolves a browser-playable clip URL through the
vss-manage-video-io-storageskill for the clip links in the report.Renders the summary and events into the report template.
Returns the rendered report.
Note
Stream summary and Q&A are experimental and are not available through Agent Skills. Use the deployed VSS Agent chat UI instead, as described in Step 4: Summarize and query a live stream in the manual flow below.
Manually#
Step 1: Deploy the Agent#
Note
Set the NGC CLI API key, then run the deploy commands for your GPU type.
Refer to VSS-Agent-Customization-configure-llm and VSS-Agent-Customization-configure-vlm for all LLM and VLM (local and remote) configuration options.
For advanced settings and Agent Customization, see the deploy command help.
# Set NGC CLI API key
export NGC_CLI_API_KEY='your_ngc_api_key'

# View all available options
deploy/docker/scripts/dev-profile.sh --help
deploy/docker/scripts/dev-profile.sh up -p lvs -H H100
deploy/docker/scripts/dev-profile.sh up -p lvs -H H100 \
    --llm-device-id 0 --vlm-device-id 1
export LLM_ENDPOINT_URL=https://your-llm-endpoint.com
deploy/docker/scripts/dev-profile.sh up -p lvs -H H100 \
    --use-remote-llm
export VLM_ENDPOINT_URL=https://your-vlm-endpoint.com
deploy/docker/scripts/dev-profile.sh up -p lvs -H H100 \
    --use-remote-vlm
export LLM_ENDPOINT_URL=https://your-llm-endpoint.com
export VLM_ENDPOINT_URL=https://your-vlm-endpoint.com
deploy/docker/scripts/dev-profile.sh up -p lvs -H H100 \
    --use-remote-llm --use-remote-vlm
deploy/docker/scripts/dev-profile.sh up -p lvs -H RTXPRO6000BW
deploy/docker/scripts/dev-profile.sh up -p lvs -H RTXPRO6000BW \
    --llm-device-id 0 --vlm-device-id 1
export LLM_ENDPOINT_URL=https://your-llm-endpoint.com
deploy/docker/scripts/dev-profile.sh up -p lvs -H RTXPRO6000BW \
    --use-remote-llm
export VLM_ENDPOINT_URL=https://your-vlm-endpoint.com
deploy/docker/scripts/dev-profile.sh up -p lvs -H RTXPRO6000BW \
    --use-remote-vlm
export LLM_ENDPOINT_URL=https://your-llm-endpoint.com
export VLM_ENDPOINT_URL=https://your-vlm-endpoint.com
deploy/docker/scripts/dev-profile.sh up -p lvs -H RTXPRO6000BW \
    --use-remote-llm --use-remote-vlm
deploy/docker/scripts/dev-profile.sh up -p lvs -H L40S \
    --llm-device-id 0 --vlm-device-id 1
export LLM_ENDPOINT_URL=https://your-llm-endpoint.com
deploy/docker/scripts/dev-profile.sh up -p lvs -H L40S \
    --use-remote-llm
export VLM_ENDPOINT_URL=https://your-vlm-endpoint.com
deploy/docker/scripts/dev-profile.sh up -p lvs -H L40S \
    --use-remote-vlm
export LLM_ENDPOINT_URL=https://your-llm-endpoint.com
export VLM_ENDPOINT_URL=https://your-vlm-endpoint.com
deploy/docker/scripts/dev-profile.sh up -p lvs -H L40S \
    --use-remote-llm --use-remote-vlm
See Local LLM and VLM deployments on OTHER hardware for known limitations and constraints.
deploy/docker/scripts/dev-profile.sh up -p lvs -H OTHER \
    --llm-env-file /path/to/llm.env --vlm-env-file /path/to/vlm.env
deploy/docker/scripts/dev-profile.sh up -p lvs -H OTHER \
    --llm-device-id 0 --vlm-device-id 1 \
    --llm-env-file /path/to/llm.env --vlm-env-file /path/to/vlm.env
export LLM_ENDPOINT_URL=https://your-llm-endpoint.com
deploy/docker/scripts/dev-profile.sh up -p lvs -H OTHER \
    --use-remote-llm --vlm-env-file /path/to/vlm.env
export VLM_ENDPOINT_URL=https://your-vlm-endpoint.com
deploy/docker/scripts/dev-profile.sh up -p lvs -H OTHER \
    --use-remote-vlm --llm-env-file /path/to/llm.env
export LLM_ENDPOINT_URL=https://your-llm-endpoint.com
export VLM_ENDPOINT_URL=https://your-vlm-endpoint.com
deploy/docker/scripts/dev-profile.sh up -p lvs -H OTHER \
    --use-remote-llm --use-remote-vlm
This command will download the necessary containers from the NGC Docker registry and start the agent. Depending on your network speed, this may take a few minutes.
This deployment uses the following defaults:
Host IP: src IP from
ip route get 1.1.1.1LLM model: nvidia/nvidia-nemotron-nano-9b-v2
VLM model: nvidia/cosmos-reason2-8b
To use a different IP than the one derived:
-i: Manually specify the host IP address.-e: Optionally specify an externally accessible IP address for services that need to be reached from outside the host.
Note
When using a remote VLM of model-type nim (not openai), see How does a remote nim VLM access videos? for access requirements.
Once the deployment is complete, check that all the containers are running and healthy:
docker ps
Once all the containers are running, you can access the agent UI at http://<HOST_IP>:7777/.
Note
Kubernetes deployment is supported by the Video Summarization Helm chart in deploy/helm/developer-profiles/dev-profile-lvs.
Use the chart README and values-lvs.yaml in the source repository for the complete values reference.
At minimum, configure the NGC API key, storage class, external host, and Kibana public URL before running
helm dependency build and helm upgrade --install.
Example prompts#
Use natural language prompts in the chat interface. The agent routes the request to the appropriate Video Summarization, VLM, VIOS, or report tool.
Task |
Example prompt |
|---|---|
Summarize an uploaded video |
|
Generate a report for an uploaded video |
|
Generate reports for multiple uploaded videos |
|
Start stream captioning (experimental) |
|
Summarize a stream (experimental) |
|
Generate a report for a stream (experimental) |
|
Ask about stored stream captions (experimental) |
|
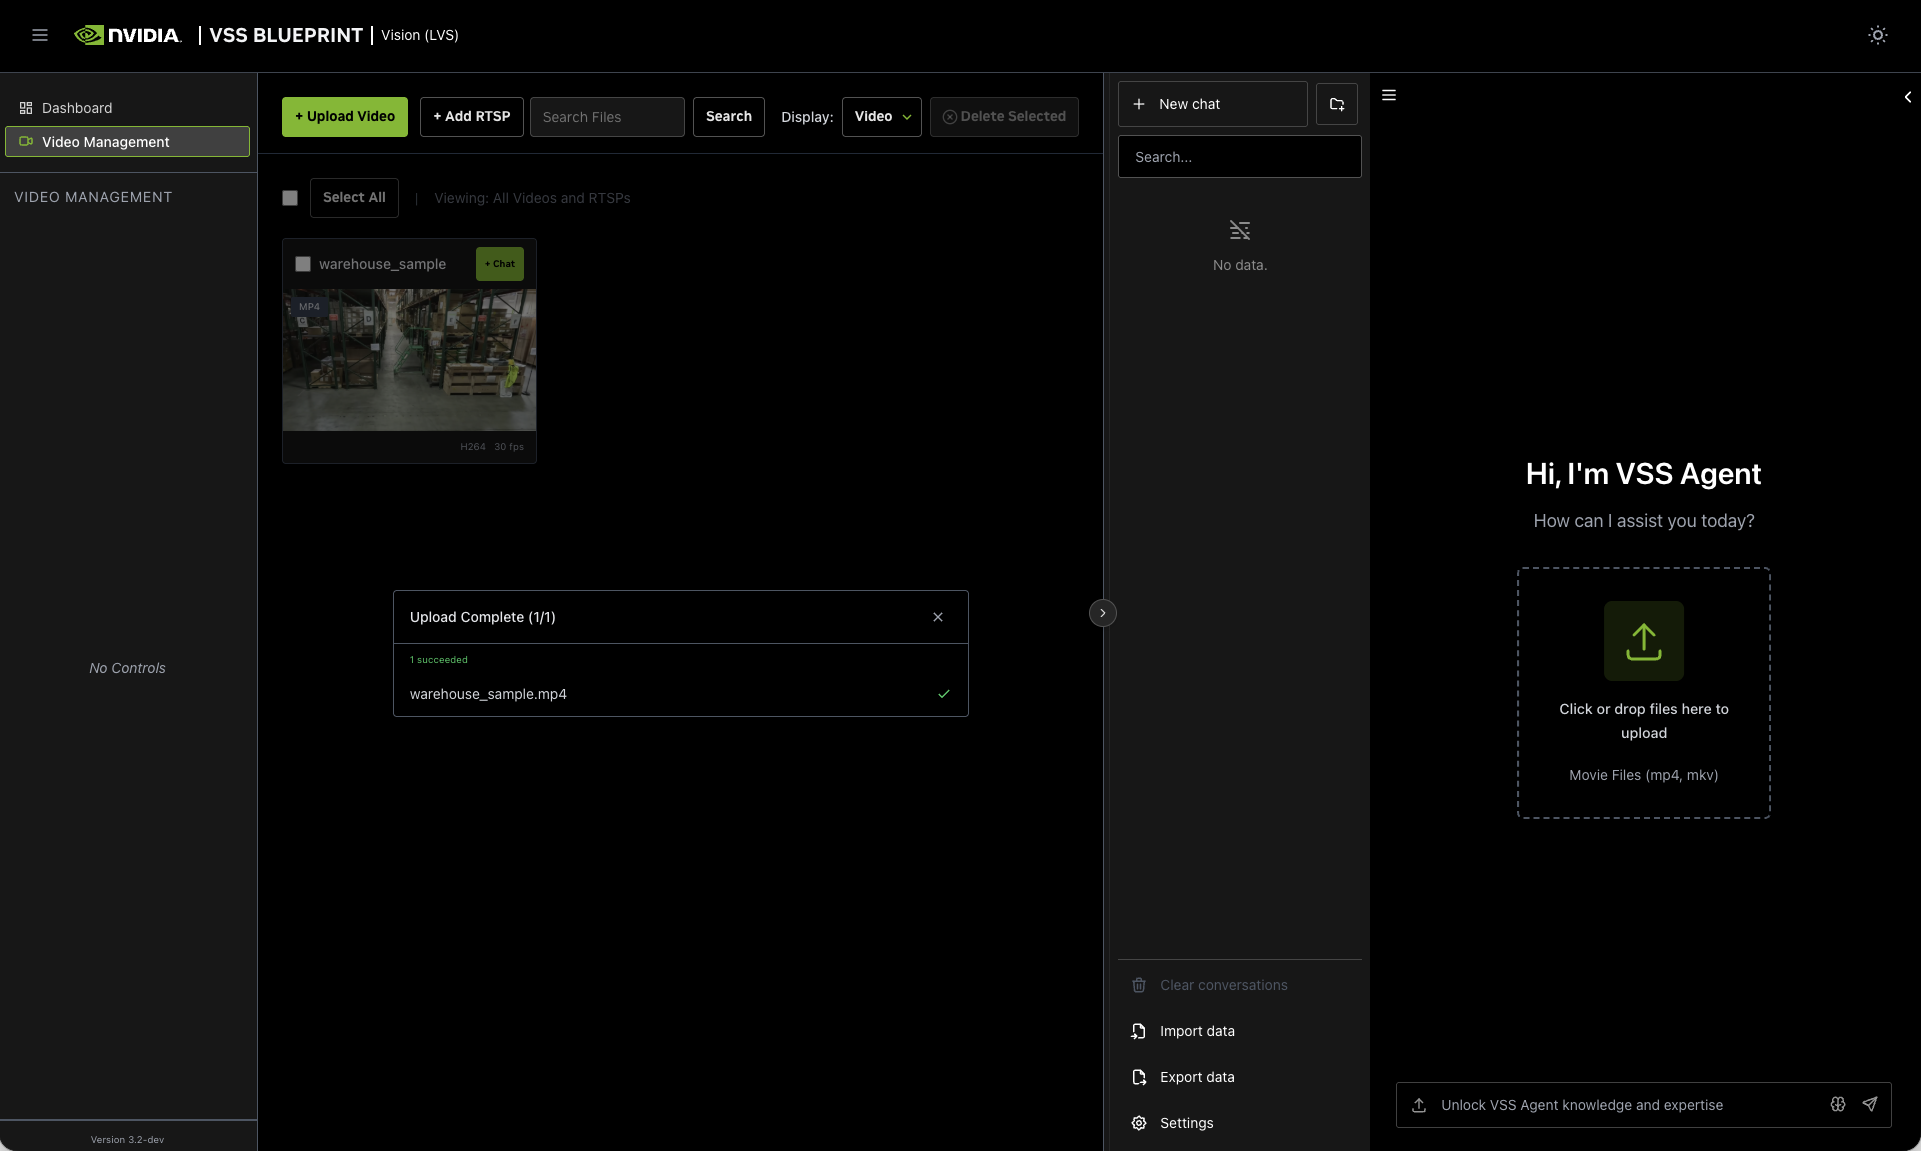
Step 2: Upload a video#
In the video management tab, drag and drop the video warehouse_sample.mp4 into the upload area.
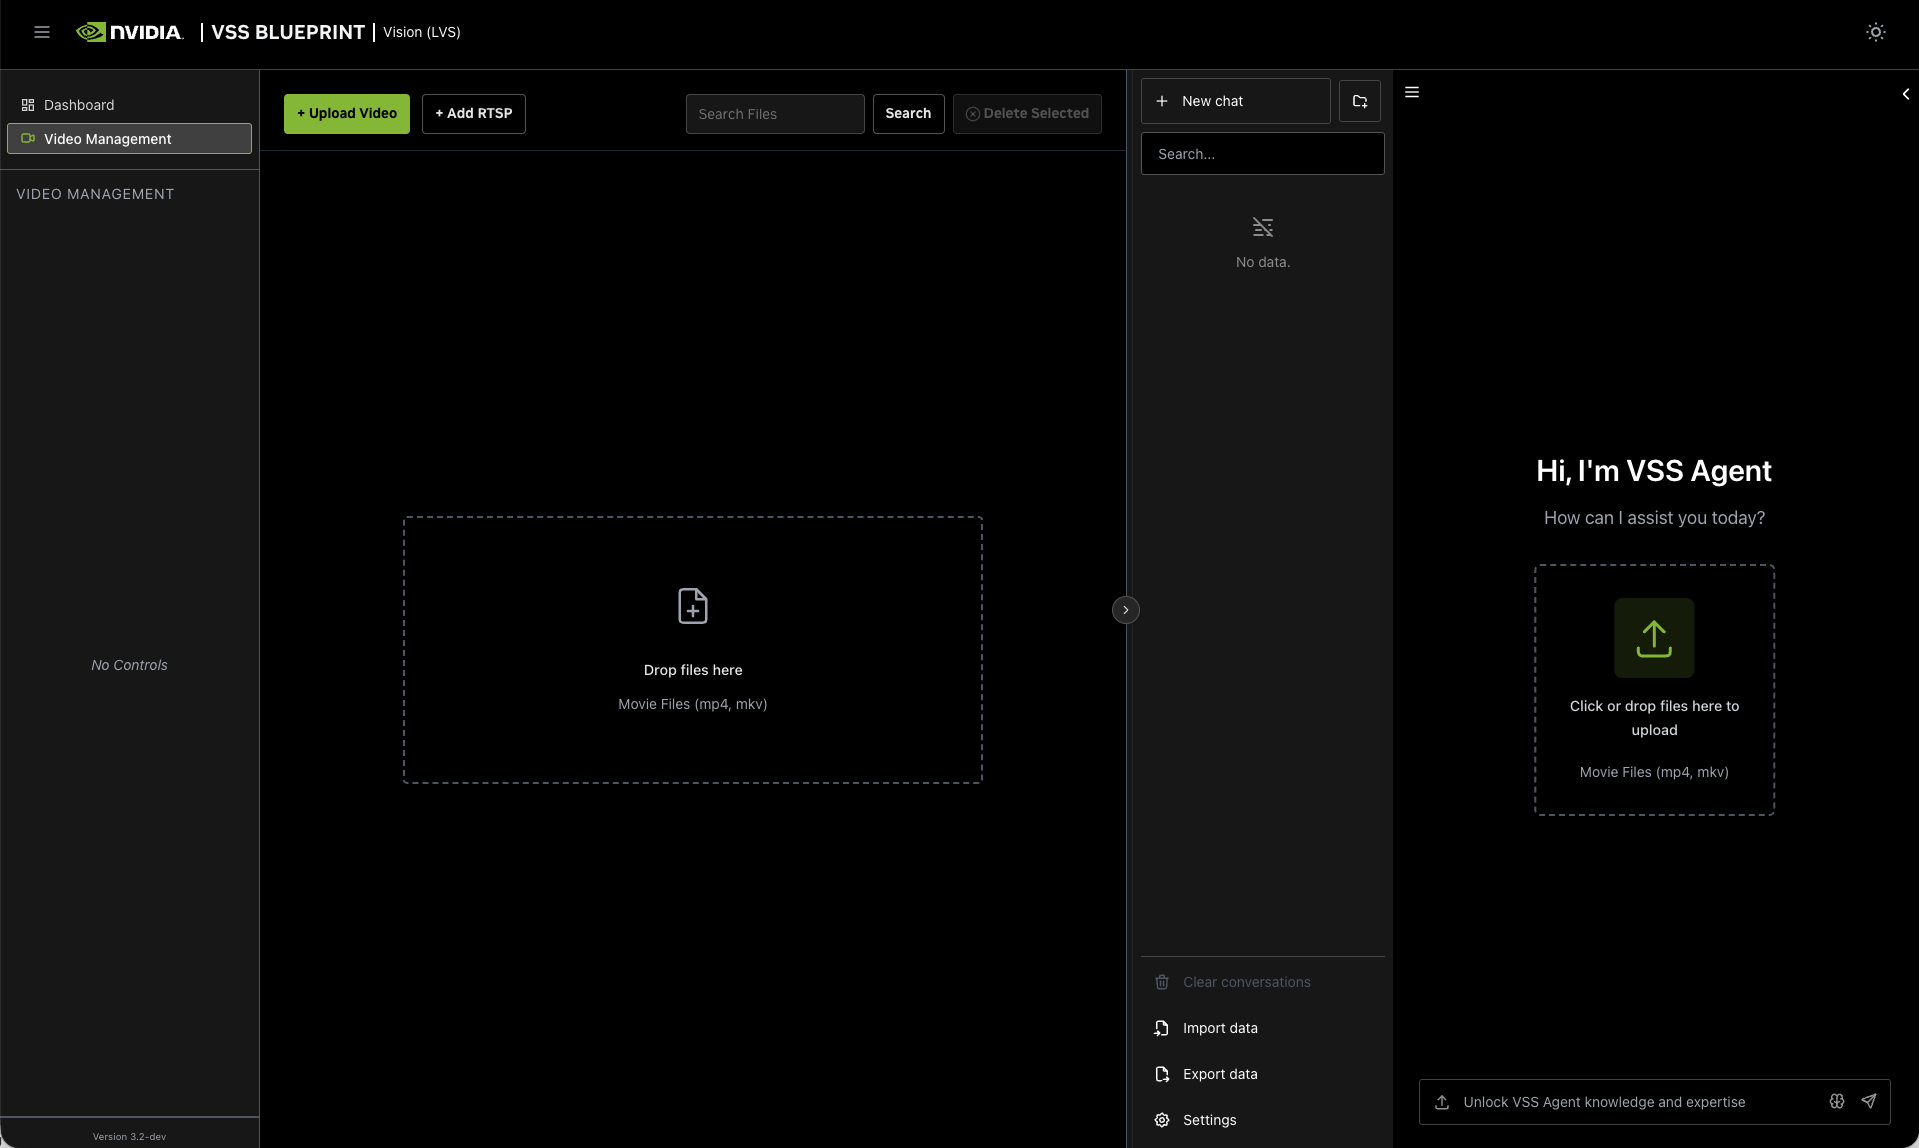
Once the video is uploaded, the video will appear in the video list.
Step 3: Generate a report for uploaded videos#
Ask the agent to generate a report about the uploaded video. Here is an example prompt:
Can you generate a report for warehouse_sample using video summarization?
To generate reports across multiple uploaded videos, include the video names in one prompt:
Generate reports for warehouse_sample_1 and warehouse_sample_2.
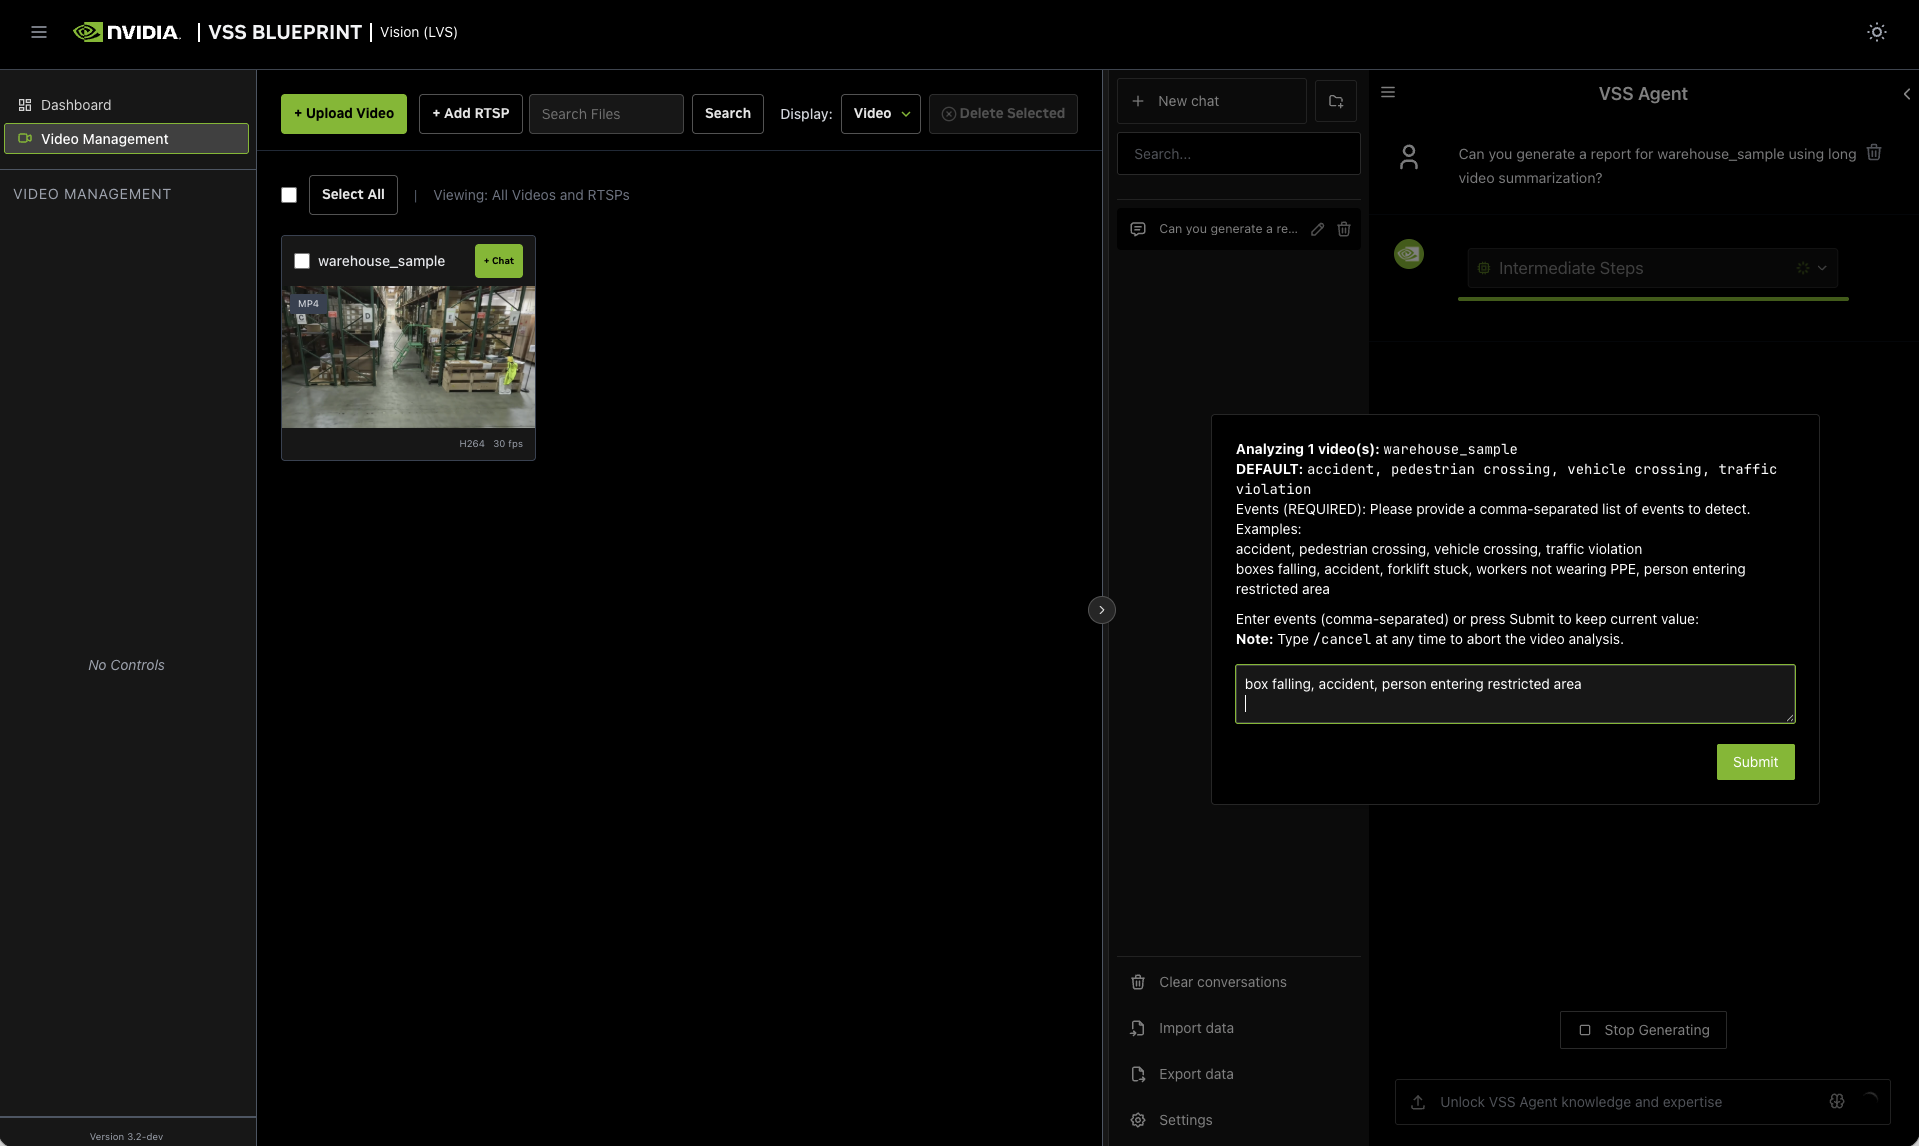
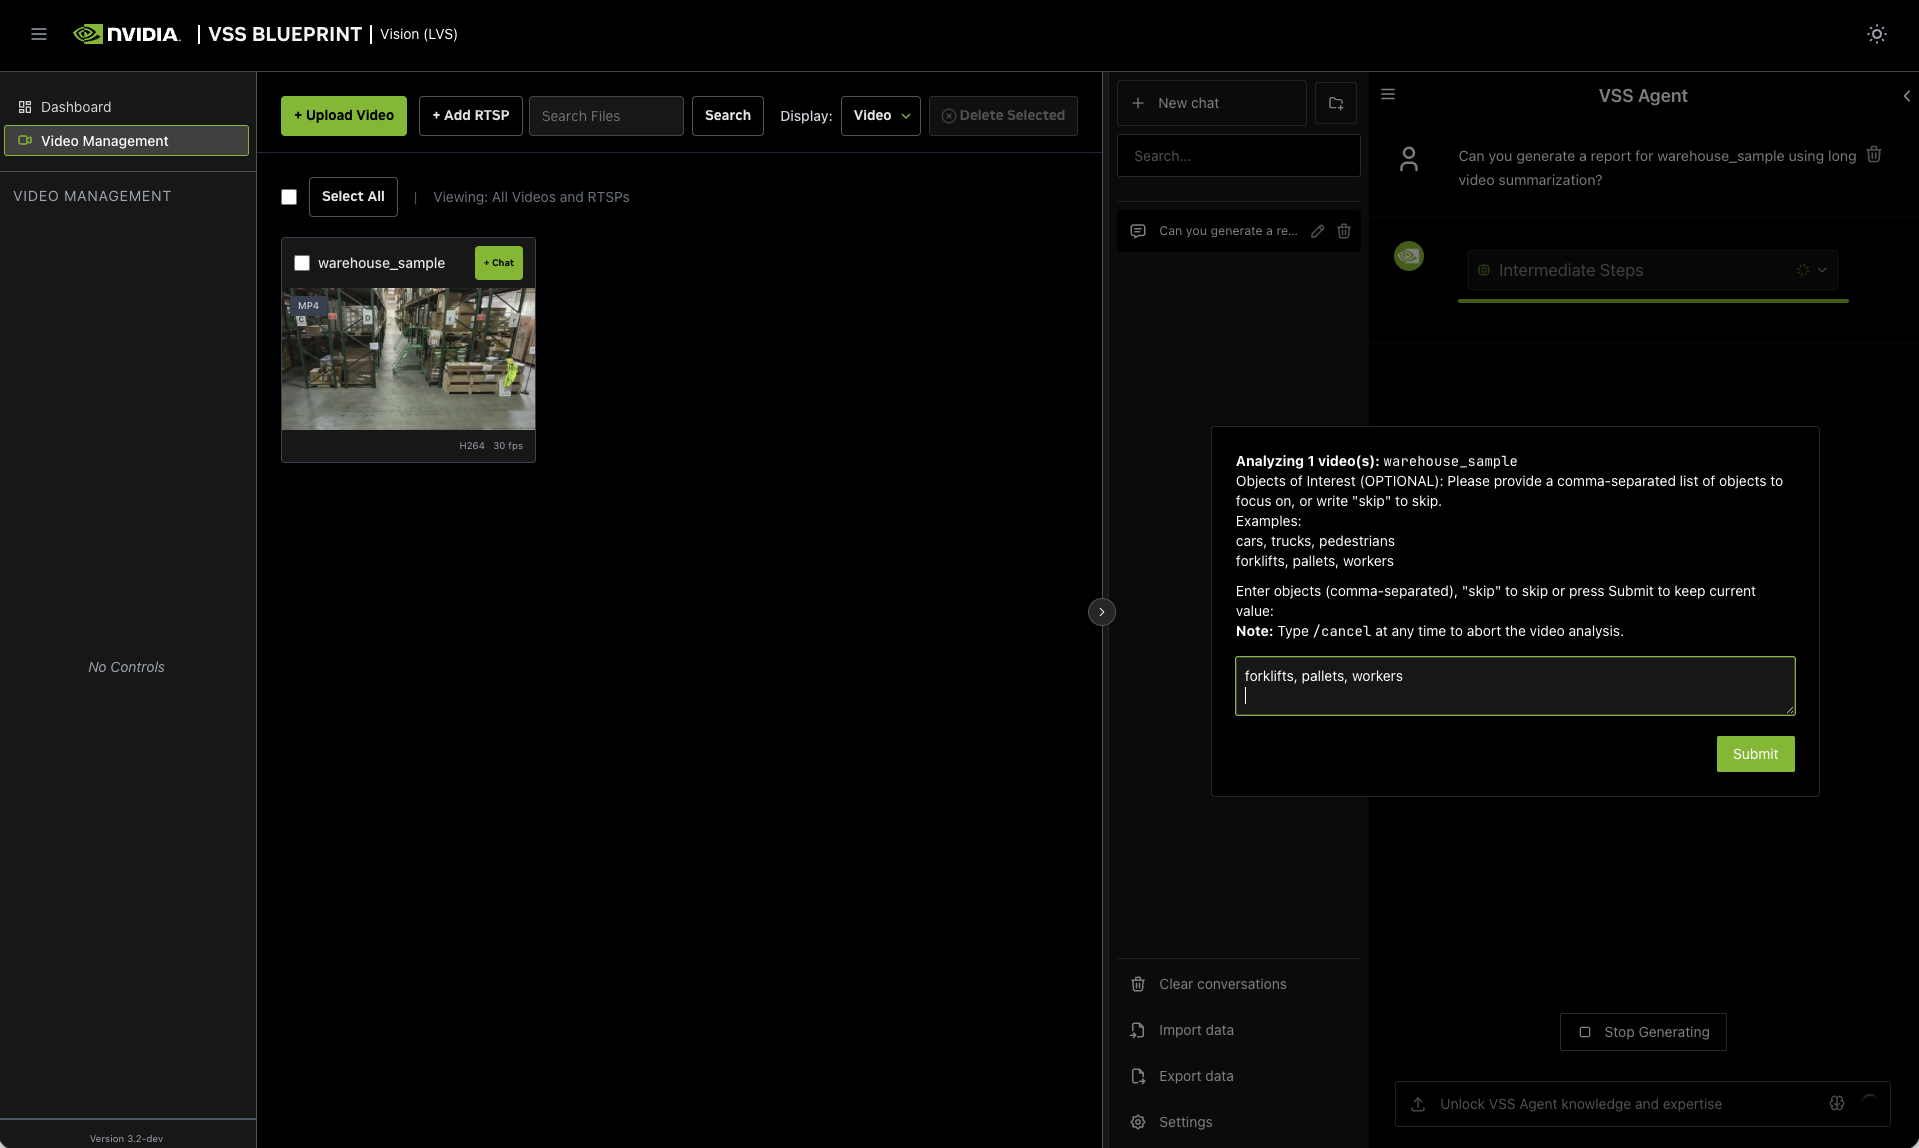
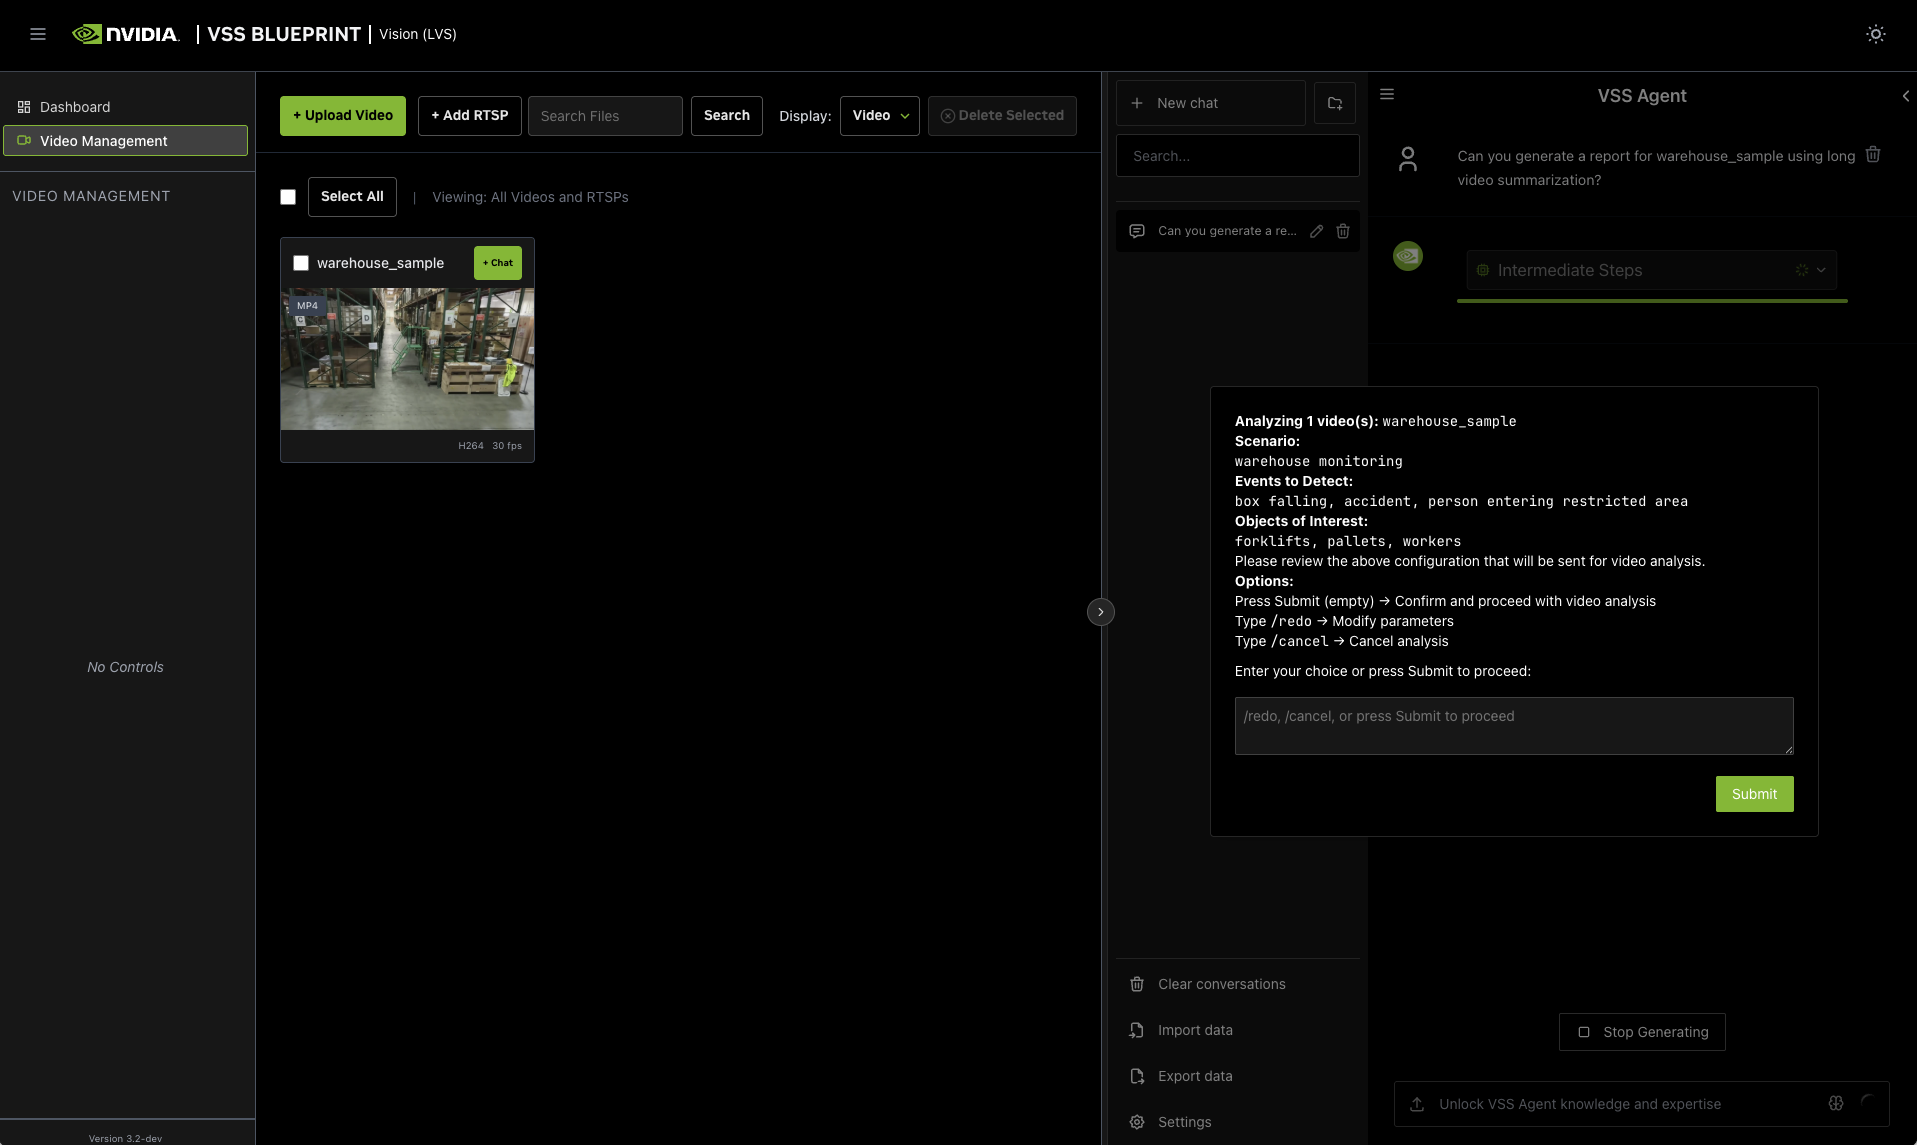
The agent will prompt you with 4 dialog windows to customize the Video Summarization microservice parameters.
You can cancel the workflow at any time by typing “/cancel” in the pop-up input box.
- Scenario
Describe the monitoring context. For example:
warehouse monitoring
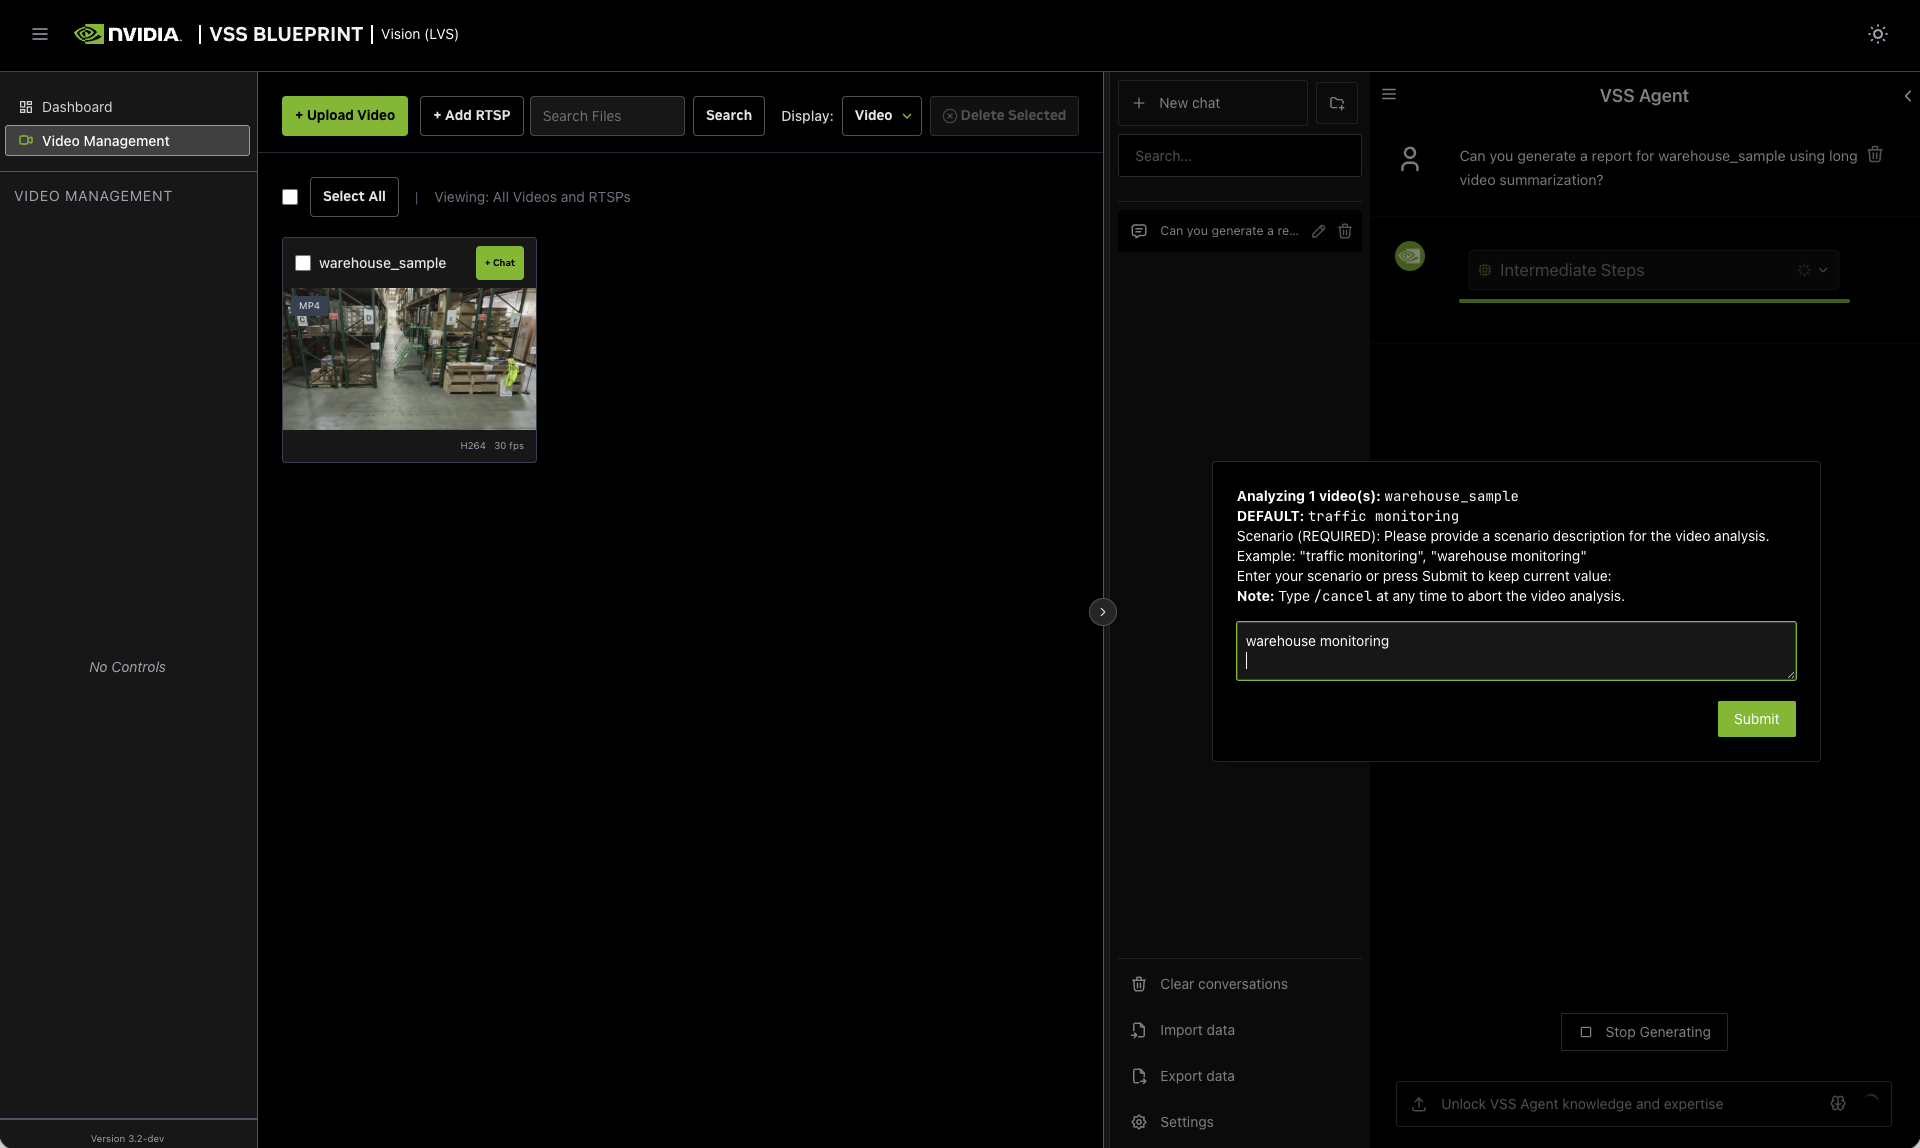
- Events
List events of interest to track. For example:
box falling, accident, person entering restricted area
- Objects of Interest
Specify objects to monitor. For example:
forklifts, pallets, workers
- Confirmation
Confirm the prompts by clicking “Submit”.
You can also redo the prompts by typing “/redo” or cancel the workflow by typing “/cancel”.
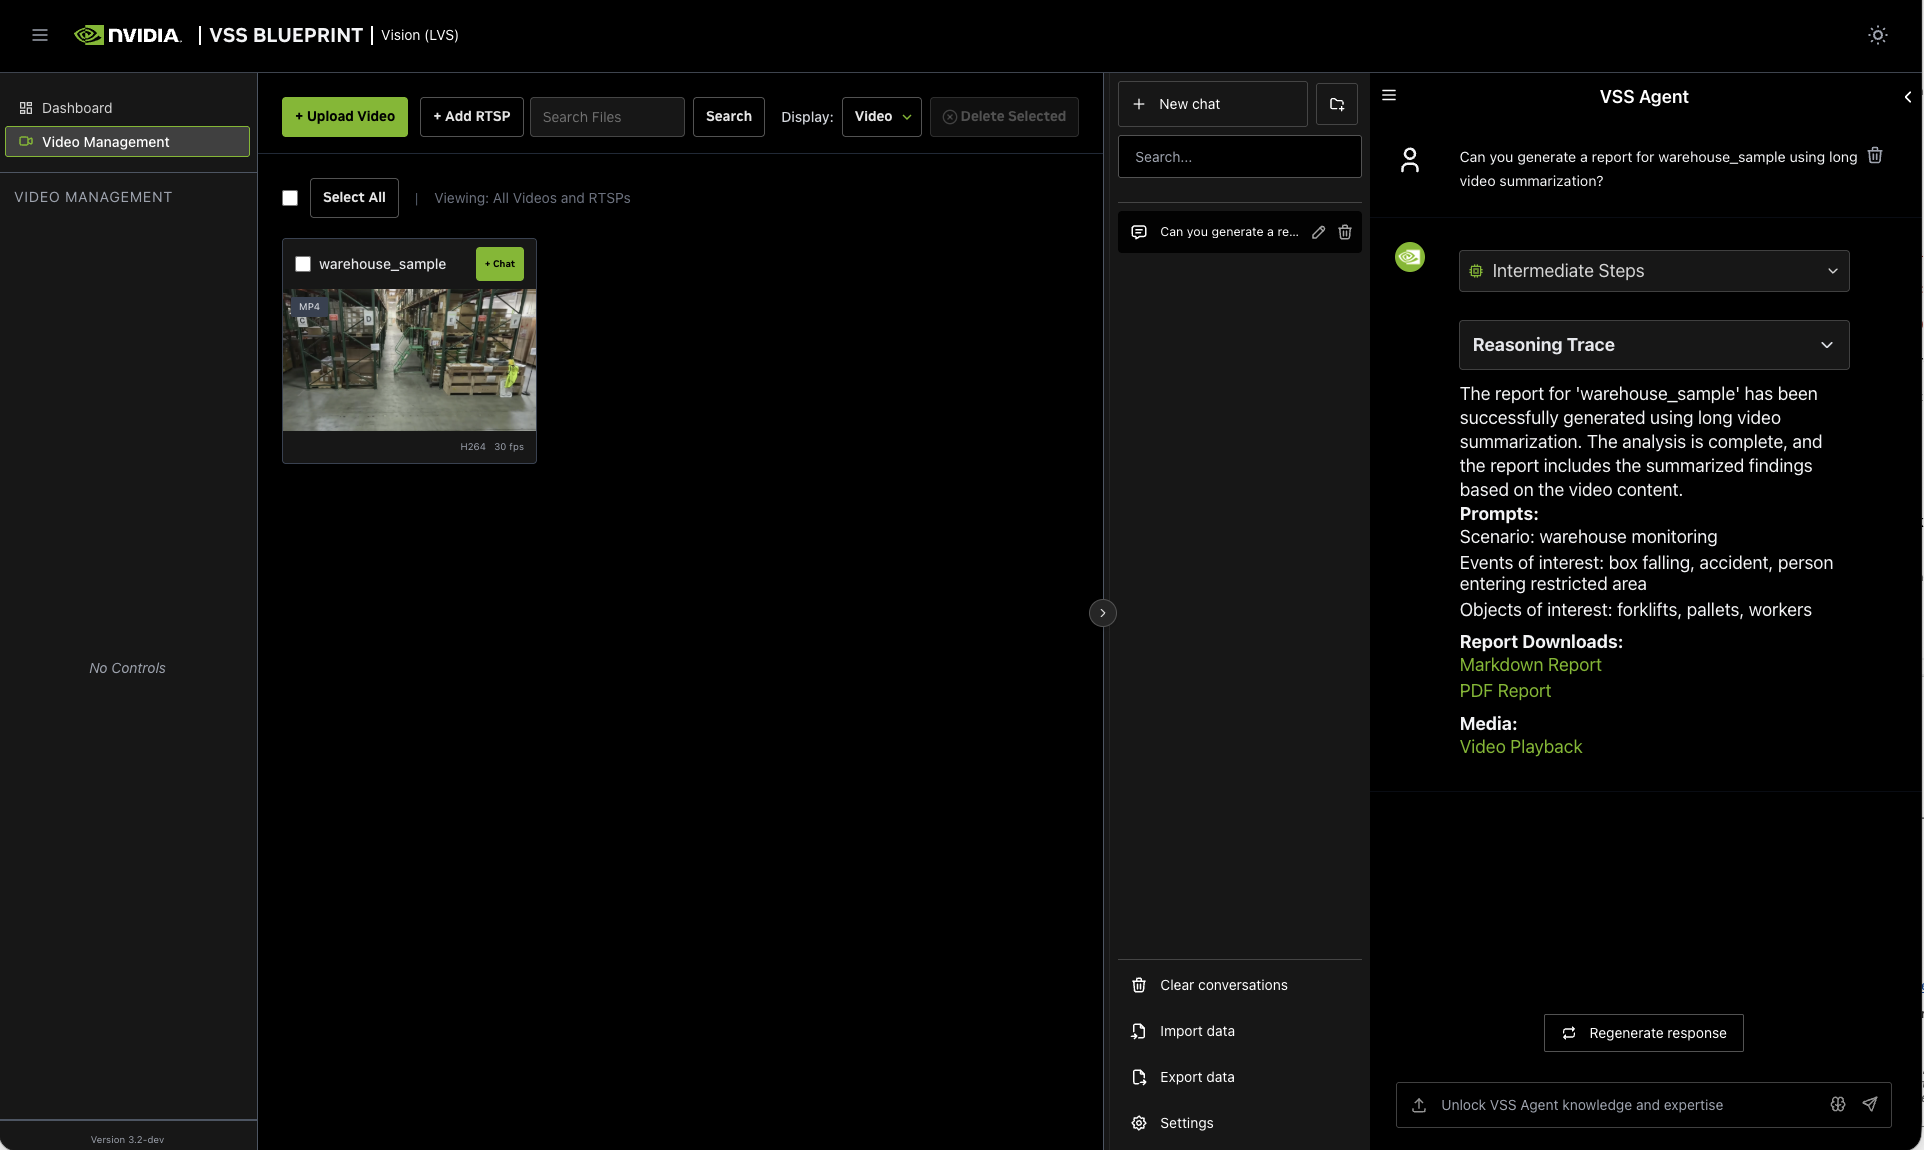
If you did not cancel the workflow, the agent will show the intermediate steps of the agent’s reasoning while the response is being generated and then output the final answer. You can download the report in PDF format by clicking on “PDF Report” in the agent’s response:
Step 4: Summarize and query a live stream#
Note
Stream summary, stream report generation, and stored-caption Q&A are experimental. The supported flow is to add a stream from the Video Management tab, ask the agent to start generating captions for the stream, wait for captions to accumulate, and then request a summary or a report for a timestamp range covered by stored captions.
The Video Summarization profile can also analyze live streams. First add a stream from the Video Management tab, then ask the agent to start caption generation for that stream. The agent prompts for the same monitoring scenario, events, and optional objects of interest that are used for uploaded-video analysis.
Example prompt:
Start generating captions for stream CAM_1.
After caption generation starts, allow time for captions to accumulate before asking for summaries or questions over the stream.
Task |
Example prompt |
|---|---|
Summarize a stream time range |
|
Generate a stream report for a time range |
|
Ask about stored stream captions |
|
If no captions are available in Elasticsearch for the requested stream and time period, the summary or Q&A request can return empty results. This can happen when the requested time period is before caption generation started, or when the caption generation prompt causes no captions to be stored for that time period.
If multiple agent sessions or agent instances connect to the same backend, the caption generation prompt is overwritten by the latest query. The agent does not have visibility into caption prompts set by other agent instances.
Note
If you ask for a stream summary or report before caption generation has been started for that stream, the agent prompts you to start caption generation first instead of running the request.
Note
Stream reports differ from uploaded-video reports in their format. For example, stream reports use ISO 8601 timestamps instead of seconds, and they do not include per-event screenshots, per-event [Watch Clip] links, or a Resources playback URL.
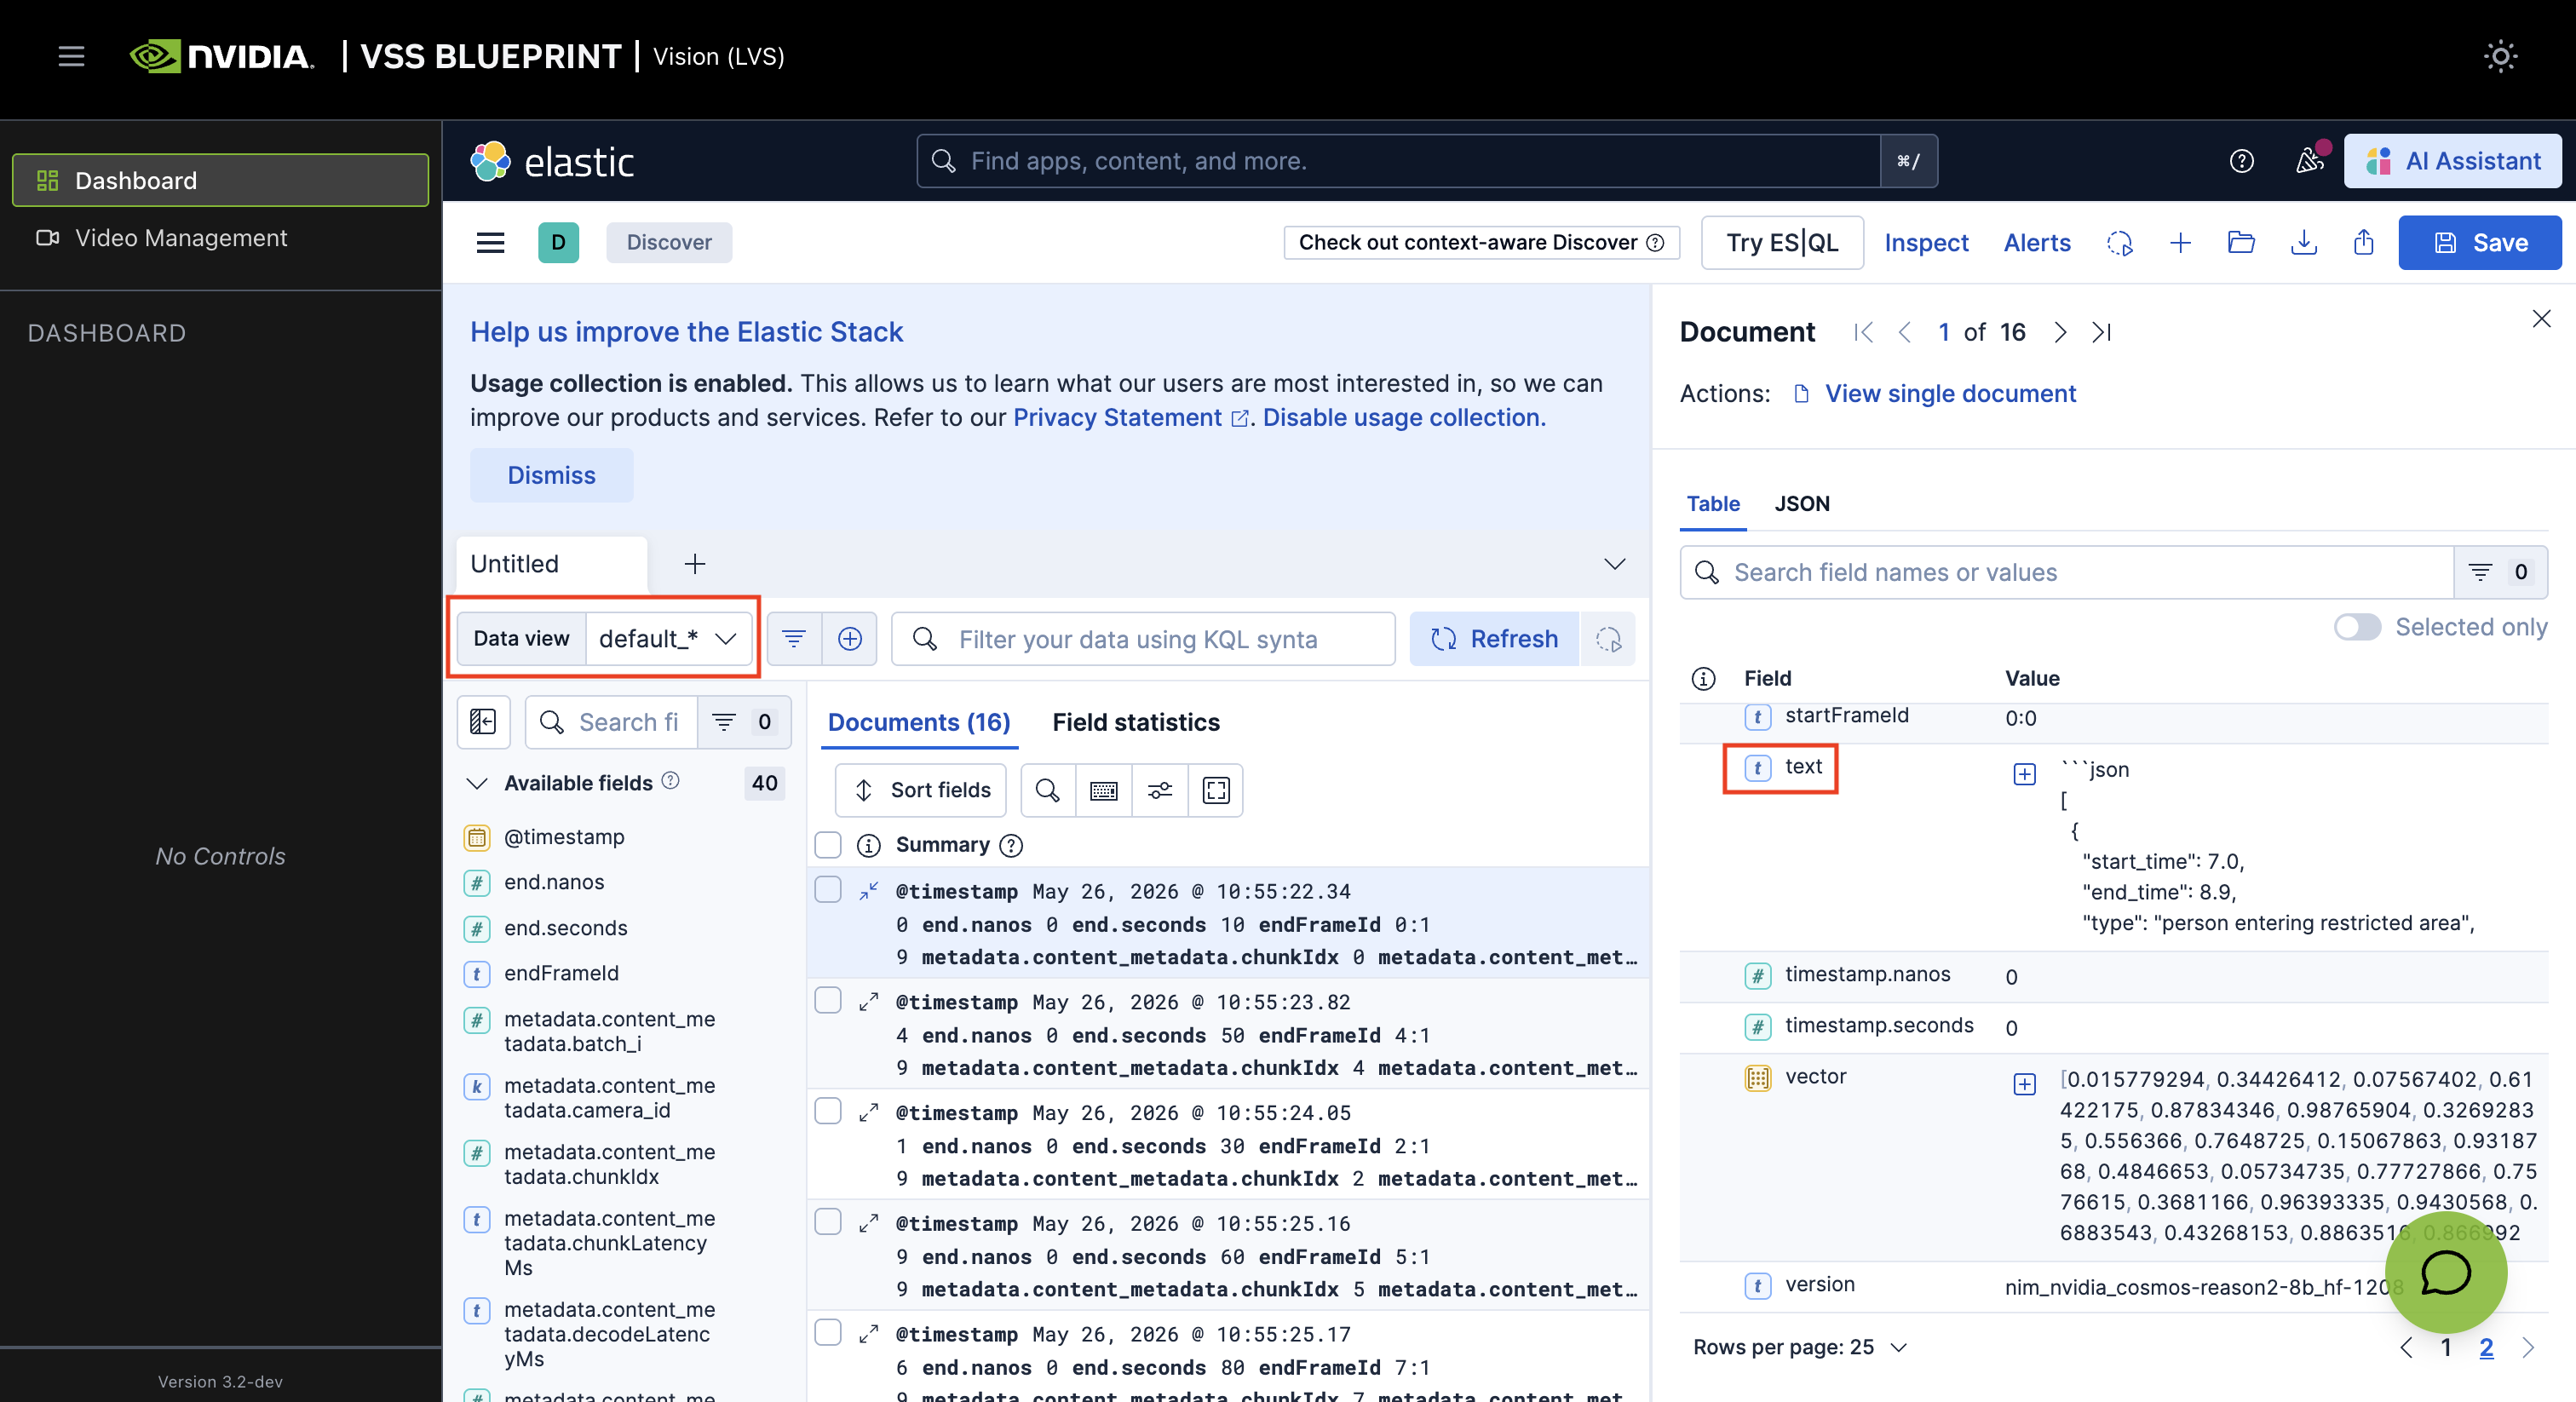
Step 5: Search for specific events in the Dashboard#
On the left sidebar, click on “Dashboard” to open the Kibana dashboard in the main window. From the menu icon, choose the “Discover” tab.
Set default_* in the Data view dropdown. Here you can see the events detected in the video or stream. When you click on a row item, a panel opens on the right side with details about the backend request and the event.
Step 6: Teardown the Agent#
To teardown the agent, run the following command:
deploy/docker/scripts/dev-profile.sh down
This command will stop and remove the agent containers.
Service Endpoints#
Once deployed, the following services are available:
Service |
URL |
|---|---|
VSS UI |
|
Kibana UI |
|
NVStreamer UI |
|
VST UI |
|
Phoenix UI |
|
Optional: Use Nemotron-3-Nano-Omni (audio-aware VLM)#
The LVS profile defaults to Cosmos-Reason2-8B as the VLM.
To swap in Nemotron-3-Nano-Omni-30B-A3B-Reasoning-FP8 for audio-aware
summarization, edit deploy/docker/developer-profiles/dev-profile-lvs/.env
and set the following variables (replace <your_hf_token> with your Hugging
Face token):
RTVI_VLM_MODEL_TO_USE=vllm-compatible
RTVI_VLM_MODEL_PATH='git:https://huggingface.co/nvidia/Nemotron-3-Nano-Omni-30B-A3B-Reasoning-FP8'
VLM_MODEL_SUPPORTS_AUDIO=true
VLM_TRUST_REMOTE_CODE=true
INSTALL_PROPRIETARY_CODECS=true
HF_TOKEN=<your_hf_token>
Also, turn on the ENABLE_AUDIO flag in the same file:
ENABLE_AUDIO=true
In addition, update the model name at the top of the same file:
VLM_NAME=Nemotron-3-Nano-Omni-30B-A3B-Reasoning-FP8
The default RTVI_VLLM_GPU_MEMORY_UTILIZATION of 0.35 is tuned for
Cosmos-Reason2-8B. Tune it for the Nemotron-3-Nano-Omni model and export it
before running dev-profile.sh. For example:
export RTVI_VLLM_GPU_MEMORY_UTILIZATION=0.45
bash deploy/docker/scripts/dev-profile.sh up -p lvs
After the deployment is complete, verify with:
curl http://${HOST_IP}:8018/v1/models | jq
The response should show "audio_support": true and the
Nemotron-3-Nano-Omni model ID.
For full RTVI-VLM environment variable reference, see Real-Time VLM Microservice.
Next steps#
Once you’ve familiarized yourself with the Video Summarization workflow, you can explore adding other agent workflows, such as search and alerting.
Additionally, you can dive deeper into the agent tools for video management, report generation, and video understanding.
Known Issues#
For OpenAI remote VLM endpoint, please use gpt-4o for now. Other models are not supported yet.
Not supported: OpenAI VLM with a build.nvidia.com LLM. When using a build.nvidia.com LLM, do not use an OpenAI VLM or set
OPENAI_API_KEY.
For known issues and limitations, see:
Agent Known Issues - VSS Agent known issues and limitations
Known Issues - VSS Agent UI known issues
Troubleshooting#
When encountering issues with the Video Summarization workflow:
View container logs - See Viewing Container Logs for instructions on viewing and analyzing container logs
Navigate the Phoenix UI - See Navigating the Phoenix UI for step-by-step guidance on viewing traces and debugging agent workflows
Check known issues - Review Agent Known Issues (agent) and Known Issues (UI) for documented limitations and workarounds