Setup VSS and Skills#
Minimum path to a deployed VSS stack driven from the NemoClaw / OpenClaw chat UI. This notebook and setup are intended to run on the same machine that hosts VSS, that is, a machine capable of running VSS. All steps run on that VSS-capable host (such as the Brev instance) through deploy/docker/scripts/deploy_nemoclaw_vss.ipynb. For the full variable reference and optional verification cells, see Additional Configuration.
Note
To run NemoClaw on a separate machine from the VSS host, refer to the NemoClaw for OpenClaw model card and the NemoClaw OpenClaw user guide.
Prerequisites#
Access to the VSS repository.
A Brev instance with Docker,
curl,python3, anduv.Before launching, you can edit the Brev hardware profile and cloud service provider (CSP). See Brev hardware and CSP selection.
A Jupyter kernel with Python 3.11 or newer to run
deploy_nemoclaw_vss.ipynb.Auto-fulfilled when running from the Brev launchable above.
NGC_CLI_API_KEY(NVIDIA legacy API key)for
nvcr.iologin, NGC CLI configuration, and NGC model artifact downloads.
An OpenClaw chat model provider:
NVIDIA_API_KEYfor the build.nvidia.com provider, ORCOMPATIBLE_API_KEYfor a cloud or local OpenAI-compatible endpoint.
Steps#
Clone the VSS repository. The VSS repository should be cloned at
~/video-search-and-summarization.If your checkout is elsewhere or the host has multiple clones, set
VSS_REPO_DIRbefore launching Jupyter so the notebook resolves the intended checkout.
Open the notebook.
deploy/docker/scripts/deploy_nemoclaw_vss.ipynb.If you are re-onboarding a host that previously ran an older OpenShell gateway, review the NemoClaw sandbox lifecycle guidance before running the notebook.
Set required values (Section 1.1):
NGC_CLI_API_KEY = "..."
HARDWARE_PROFILE = "RTXPRO6000BW"  # H100 | L40S | RTXPRO6000BW | DGX-SPARK | IGX-THOR | AGX-THOR | OTHER
Select the supported
HARDWARE_PROFILEthat matches your system specs.DGX-SPARK,IGX-THOR, andAGX-THORare edge hardware profiles and are valid only for thebaseandalertsprofiles.Choose one OpenClaw model provider (Section 1.2). NemoClaw uses this model provider for its agent workflow.
SOTA cloud model, recommended for best agent quality. Use any OpenAI-compatible cloud endpoint:
NEMOCLAW_ENDPOINT_URL = "https://<provider-base-url>/v1/"
NEMOCLAW_MODEL = "<model-id>"
COMPATIBLE_API_KEY = "<provider-api-key>"
Local OpenAI-compatible model. Use a local or LAN model server that the sandbox can reach:
NEMOCLAW_ENDPOINT_URL = "http://host.openshell.internal:8000/v1"
NEMOCLAW_MODEL = "nvidia/nemotron-3-super-120b-a12b"
COMPATIBLE_API_KEY = "EMPTY"
COMPATIBLE_API_KEYmust be a non-empty value even when the local server ignores it. From inside the sandbox, the host is reached throughhost.openshell.internal.build.nvidia.com NVIDIA-hosted model. Clear the custom endpoint values and set
NVIDIA_API_KEY:NVIDIA_API_KEY = "nvapi-..." NEMOCLAW_MODEL = "qwen/qwen3.5-122b-a10b"
Leave
NEMOCLAW_MODELblank to use the installer default,nvidia/nemotron-3-super-120b-a12b.
Review advanced defaults (Section 1.3). These are the advanced knobs, which you usually do not need to change when running with the default settings.
Run Preflight (Section 2). Every required check should print
OK. The preflight validates the NemoClaw init script, policy file, OpenClaw plugin,skills/directory, MCP config/helper, host tools, andNGC_CLI_API_KEY.Pin Docker (Section 2.1). Run this before installing NemoClaw. The cell pins the tested Docker stack: Docker CE
29.4.3, buildx0.33.0, Compose5.1.3, and containerd2.2.3. A Docker downgrade restartsdockerdand would disrupt live sandbox containers if run later. It is safe to re-run.Run Install (Section 3). The notebook installs or reuses the pinned NemoClaw release, then runs
deploy/docker/scripts/nemoclaw/init_nemoclaw.sh. On completion:NemoClaw sandbox
demois created or reused.The OpenShell inference provider is configured for the selected build.nvidia.com, cloud OpenAI-compatible, or local OpenAI-compatible provider.
The VSS policy preset is merged into the live sandbox policy.
The NGC credential provider is configured and the NGC CLI is installed inside the sandbox on a best-effort basis.
The
.openclawplugin is packed and installed into the sandbox, which installs the repository’s VSS skills and copies the NemoClaw workspace templates.The OpenClaw UI allowed origin, gateway, dashboard forward, and optional webhooks are refreshed.
Optionally verify the sandbox (Section 4). This checks sandbox state, active policy metadata, webhooks, plugin health, installed skills, and copied workspace files.
Prepare the host for local NIM-backed VSS profiles (Section 5):
5.1 - install and configure the NGC CLI on the host.
5.2 - authenticate Docker against
nvcr.io.5.3 - run
uv syncunderservices/agent/.
These steps are required for local NIM-backed profiles and for profile flows that pull NGC model artifacts during
docker_up.Start the MCP server (Section 6.1). This launches the host-side VSS Orchestrator MCP server on port
9988and pollsvss_orchestrator__profilesuntil the server is healthy. The server log is written to<VSS_REPO_DIR>/.orchestrator-artifacts/vss_orchestrator_mcp.log.Open the OpenClaw UI (Section 6.3). Section 6.2 is reference material for the chat-driven deployment flow and has no code cell of its own. Open the UI and smoke-test it before returning to the Section 6.2 prompts.
The Section 6.3 cell prints a fresh UI link with a gateway token. Open it in a browser.
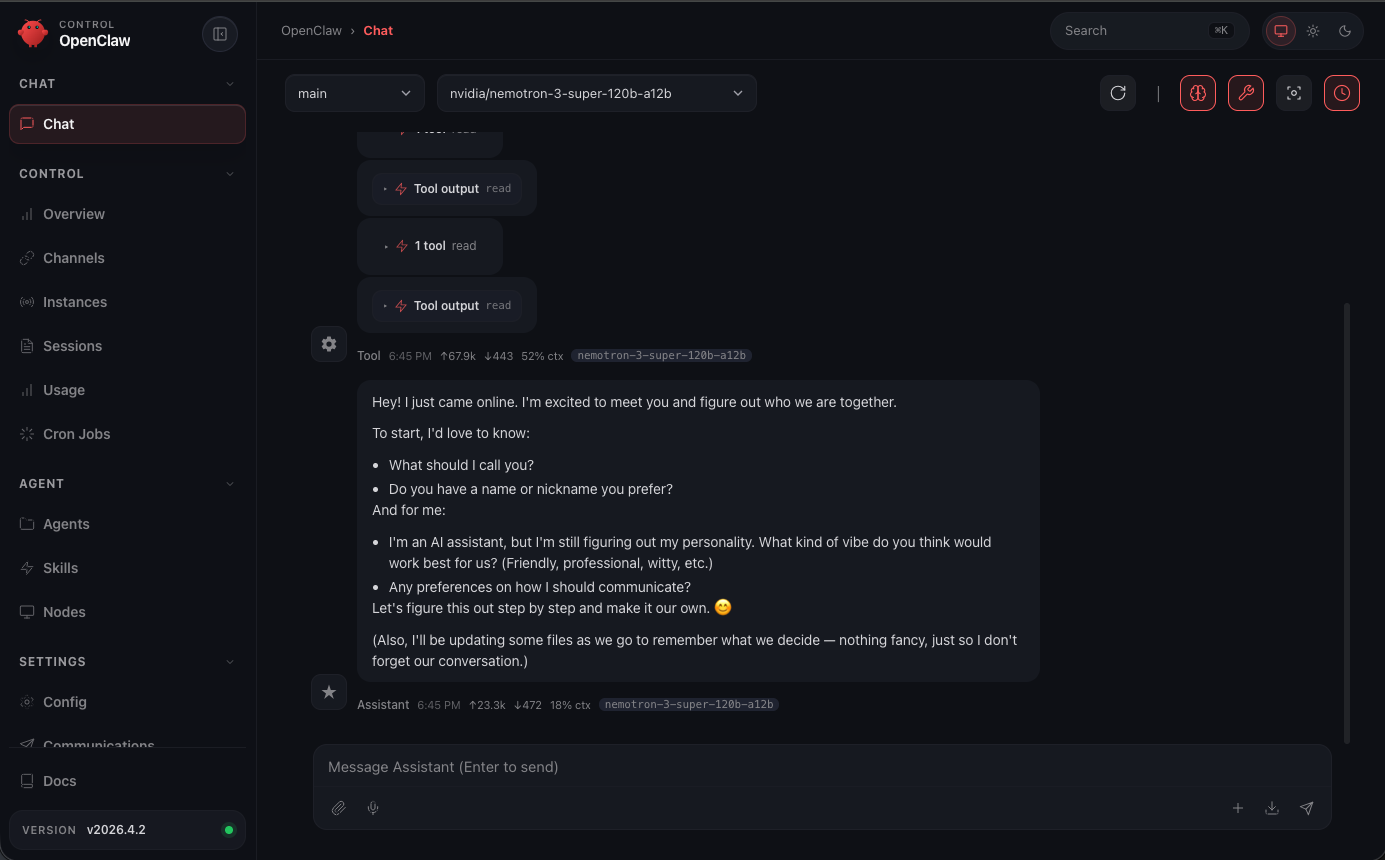
The OpenClaw chat UI once the link is opened.#
Not on Brev? Open an SSH tunnel from your laptop before opening the UI:
ssh -L 18789:127.0.0.1:18789 <user>@<nemoclaw-host>
Smoke-test chat, skills, and tools from the OpenClaw UI:
hello
what model are you using?
list your available skills
show me the deployment tools
list the available VSS deployment profiles
The Skills tab should show the installed VSS skills.
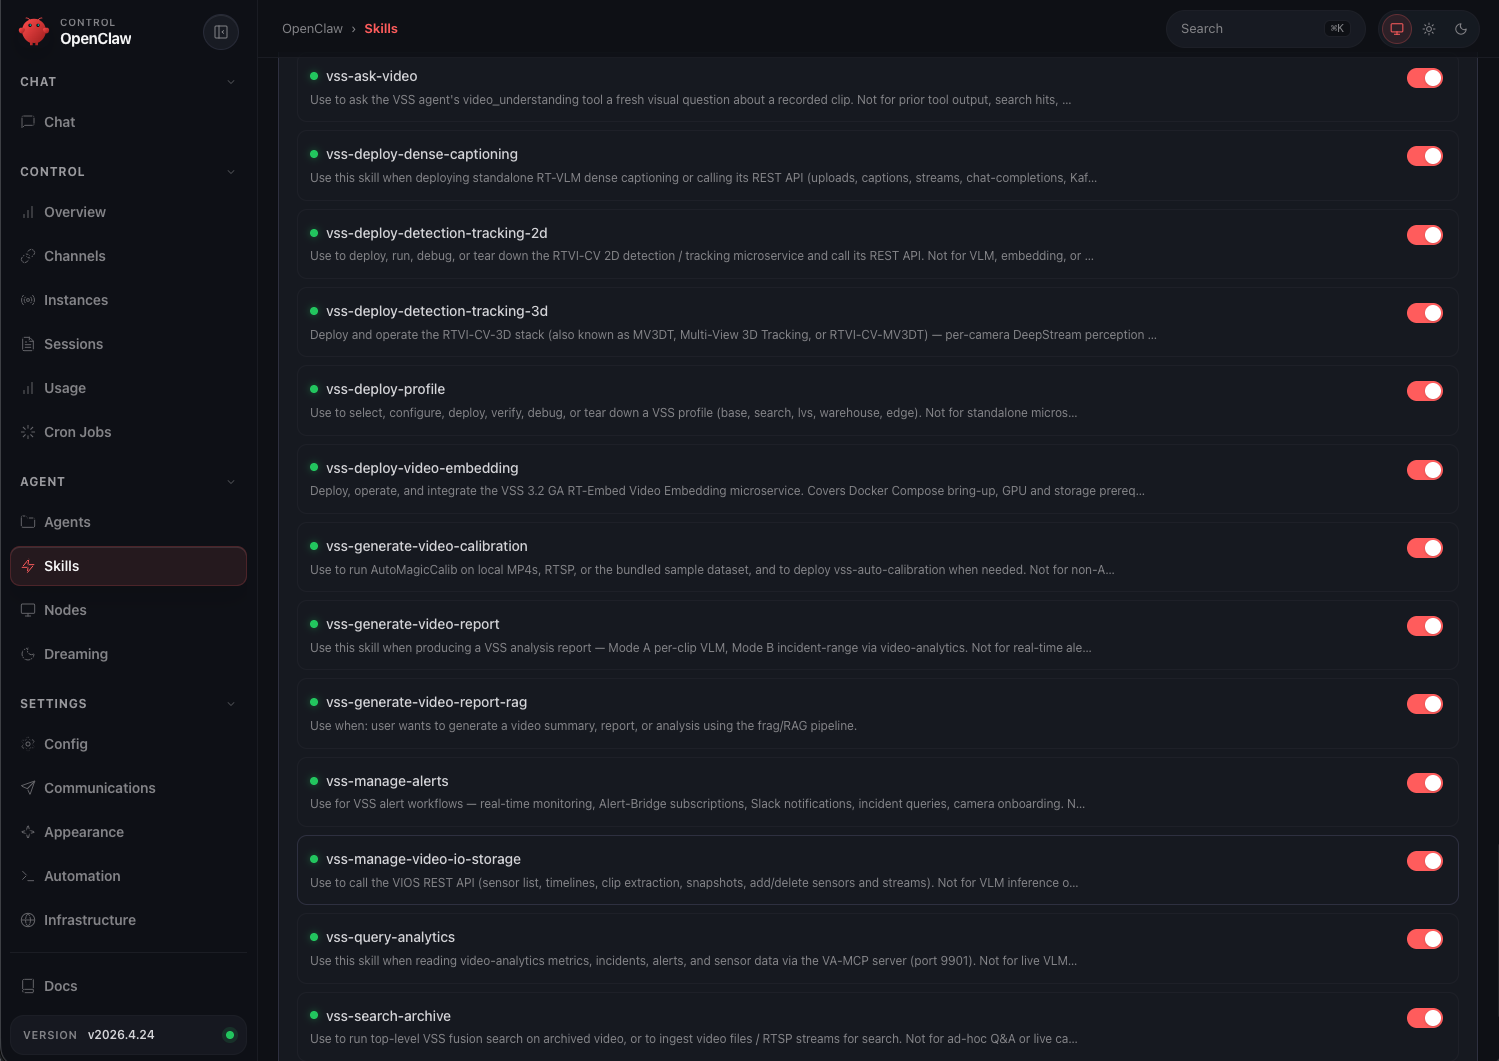
Listing the installed VSS skills from the OpenClaw chat.#
The tools prompt should enumerate the nine
vss_orchestrator__*tools.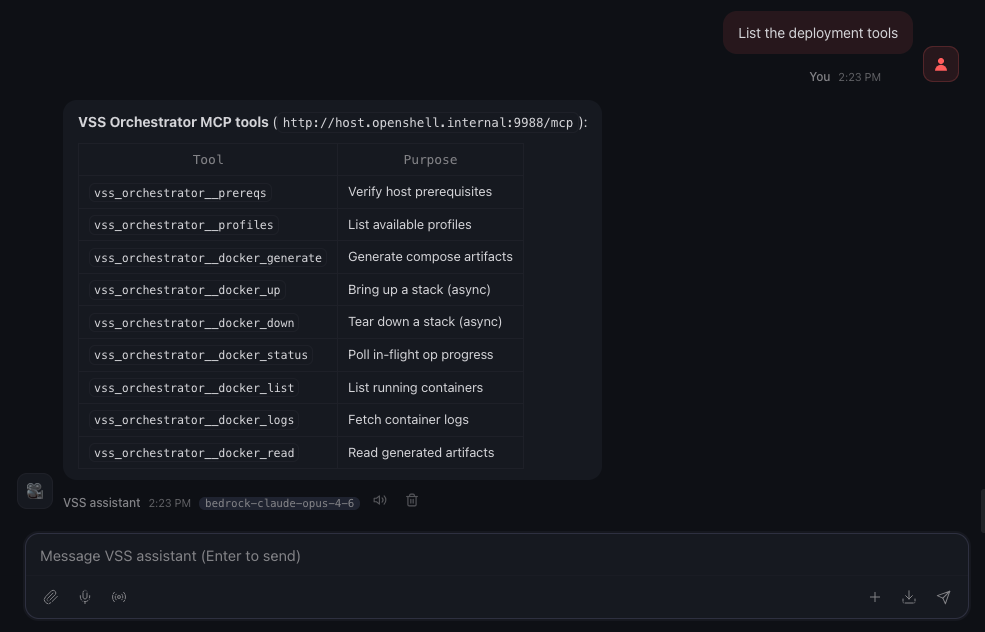
Inspecting the available VSS orchestrator MCP tools from chat.#
Deploy VSS by chat (Section 6.2). Examples:
Prompt
Tools invoked
“List the available VSS deployment profiles.”
profiles“Check that my host meets the prerequisites for the alerts profile.”
prereqs“Deploy the VSS
alertsprofile inverificationmode.”docker_generate->docker_up->docker_status“Fetch the last 20 lines of logs from
vss-alert-bridge.”docker_logs“Tear down the VSS deployment.”
docker_down->docker_status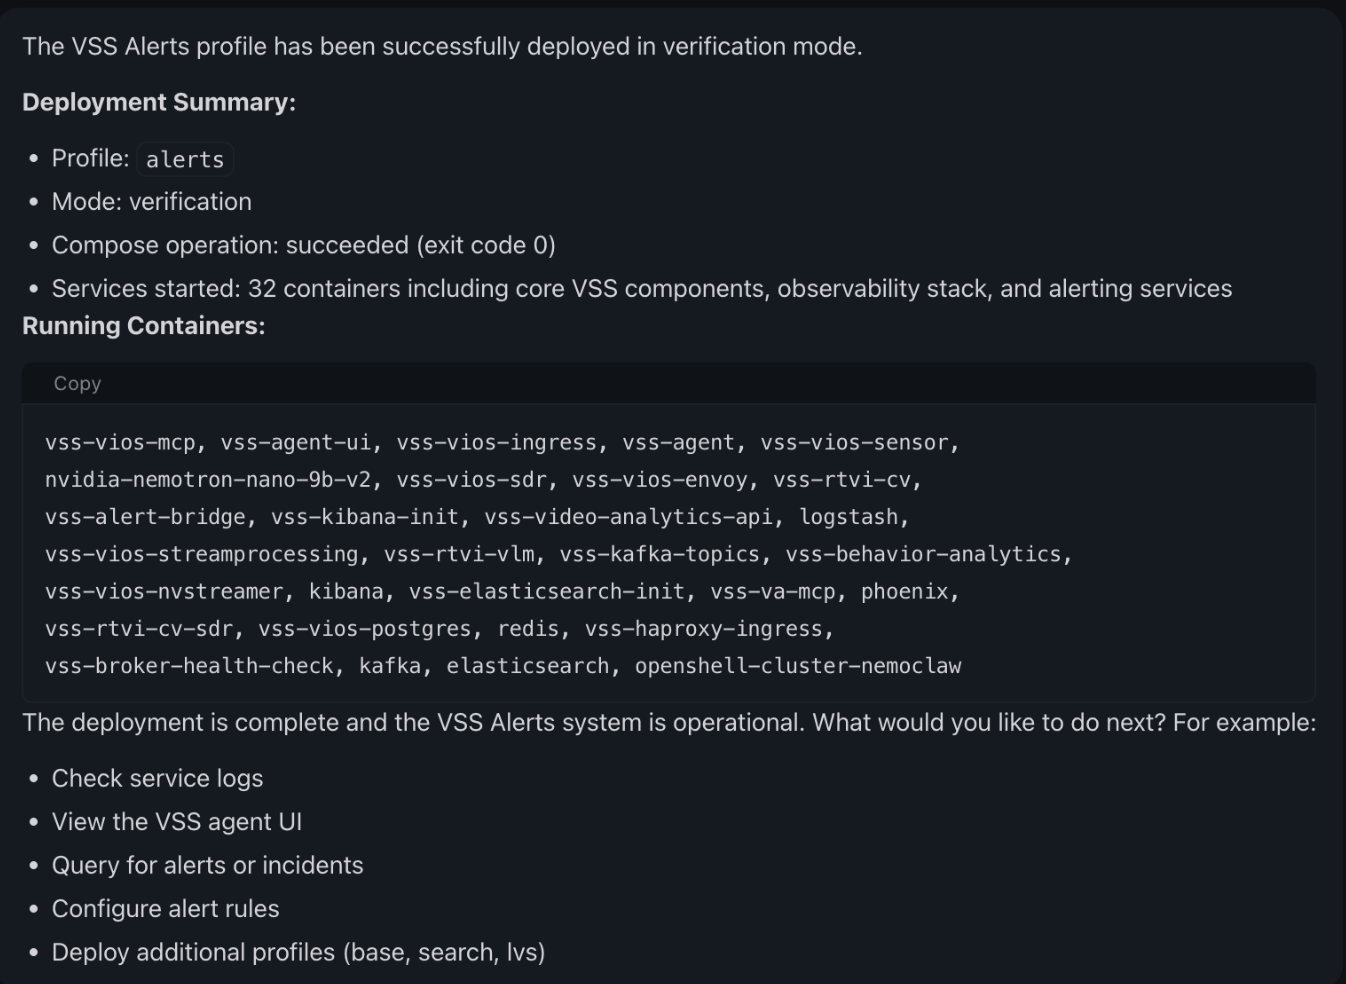
Deploying the
alertsprofile from chat.#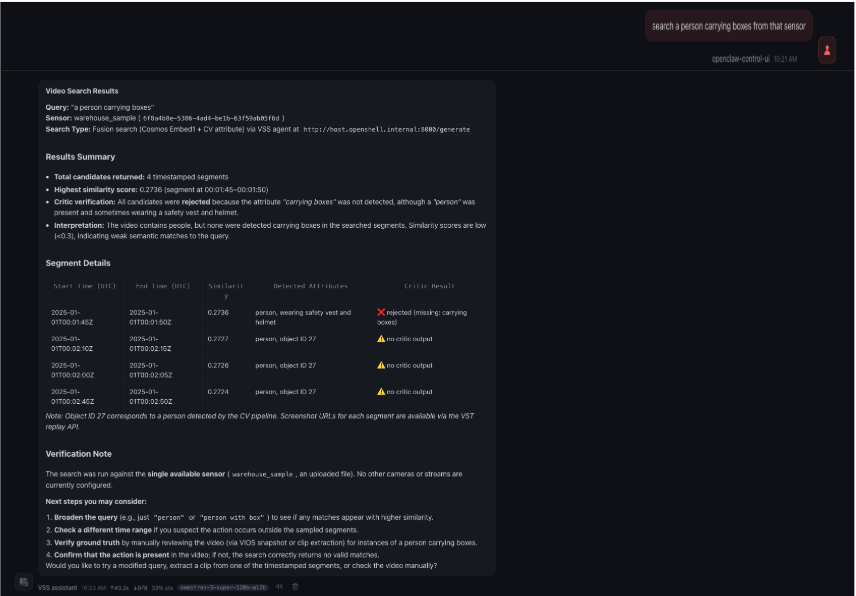
Running the
searchprofile from chat.#For the complete tool reference, see VSS Orchestrator MCP server.
Add Video Sources#
Once the VSS stack is deployed, open the VSS UI and use the Video Management tab to upload video files (MP4, MKV) or add live RTSP camera streams for the agent to ingest. See Video Management Tab for the full walkthrough of upload, RTSP setup, and stream management.