Observing a Workflow with W&B Weave#
This guide provides a step-by-step process to enable observability in a NeMo Agent toolkit workflow using Weights and Biases (W&B) Weave for tracing using just a few lines of code in your workflow configuration file.

Prerequisites#
An account on Weights & Biases is required to use Weave.
You can create an account on Weights & Biases by clicking on the “Sign Up” button in the top right corner of the website.
Under the “Account” section, you can find your API key. Click on the “Show” button to reveal the API key. Take note of this API key as you will need it to run the workflow.
export WANDB_API_KEY=<your_api_key>
Step 1: Install the Weave plugin#
To install the Weave plugin, run the following:
uv pip install -e '.[weave]'
Step 2: Install the Workflow#
Pick an example from the list of available workflows. In this guide, we will be using the simple_calculator example.
uv pip install -e examples/observability/simple_calculator_observability
Step 3: Modify Workflow Configuration#
Update your workflow configuration file to include the weave telemetry settings. For example, examples/observability/simple_calculator_observability/configs/config-weave.yml has the following weave settings:
general:
  telemetry:
    tracing:
      weave:
        _type: weave
        project: "nat-demo"
This setup enables logging trace data to W&B weave. The weave integration only requires the project parameter to be set.
Parameter |
Description |
Example |
|---|---|---|
|
The name of your W&B Weave project |
|
|
Your W&B username or team name |
|
Step 4: Run Your Workflow#
Install simple_calculator example using the instructions in the examples/observability/simple_calculator_observability/README.md guide.
Run the workflow using config-weave.yml configuration file:
nat run --config_file examples/observability/simple_calculator_observability/configs/config-weave.yml --input "Is the product of 2 * 4 greater than the current hour of the day?"
If it is your first time running the workflow, you will be prompted to login to W&B Weave.
Step 5: View Traces Data in Weave Dashboard#
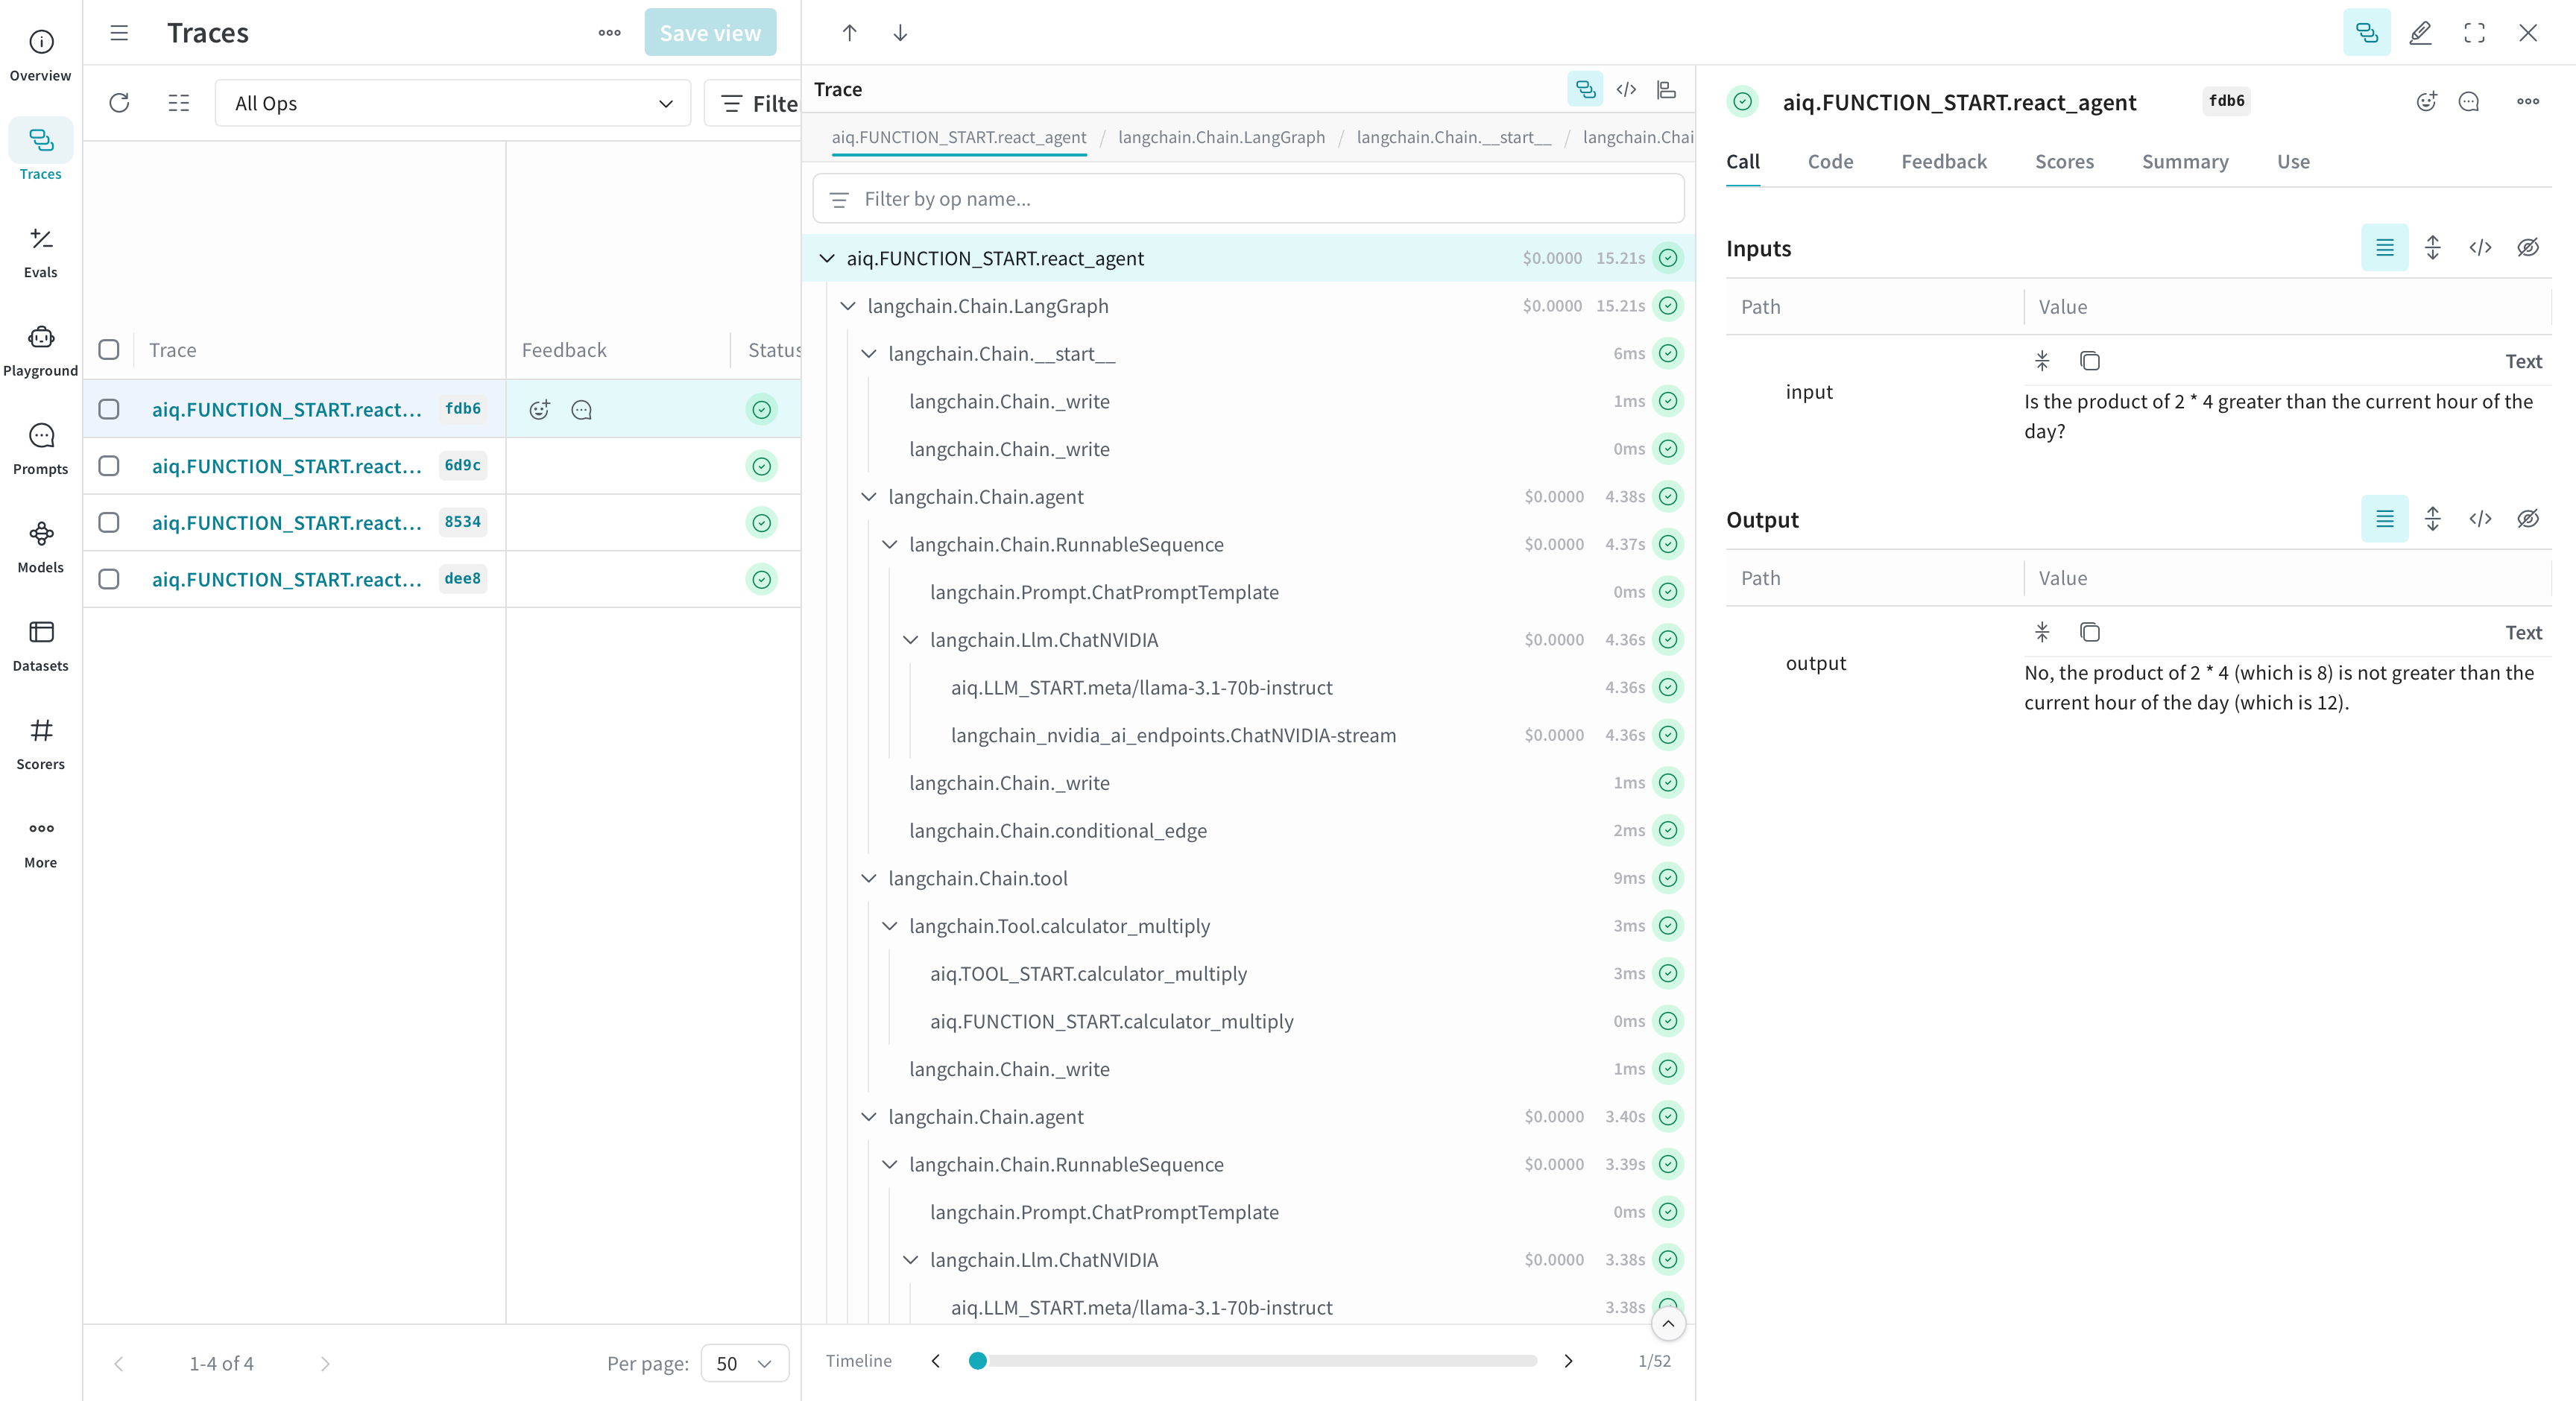
As the workflow runs, you will find a Weave URL (starting with a 🍩 emoji). Click on the URL to access your logged trace timeline.
Note how the integration captures not only the nat intermediate steps but also the underlying framework. This is because Weave has integrations with many of your favorite frameworks.
Step 6: Redacting Sensitive Data#
When tracing LLM workflows, you may be processing sensitive information like personal identifiers, credit card numbers, or API keys. NeMo Agent toolkit Weave integration supports automatic redaction of Personally Identifiable Information (PII) and sensitive keys from your traces.
Prerequisites#
To enable PII redaction, you need presidio-analyzer and presidio-anonymizer installed. Installing the weave plugin will install these packages for you.
Enabling PII Redaction#
Update your workflow configuration to enable PII redaction:
general:
  telemetry:
    tracing:
      weave:
        _type: weave
        project: "nat-demo"
        redact_pii: true                    # Enable PII redaction
        redact_pii_fields:                  # Optional: specify which entity types to redact
          - EMAIL_ADDRESS
          - PHONE_NUMBER
          - CREDIT_CARD
          - US_SSN
          - PERSON
        redact_keys:                        # Optional: specify additional keys to redact
          - custom_secret
          - api_key
          - auth_token
Redaction Options#
The Weave integration supports the following redaction options:
Parameter |
Description |
Required |
|---|---|---|
|
Enable PII redaction (true/false) |
No (default: false) |
|
List of PII entity types to redact |
No (default: all supported entities) |
|
List of additional keys to redact beyond the defaults |
No |
When redact_pii is enabled, common PII entities like email addresses, phone numbers, credit cards, and more are automatically redacted from your traces before they are sent to Weave. The redact_pii_fields parameter allows you to customize which entity types to redact.
See the Microsoft Presidio documentation for a full list of supported entity types.
Additionally, the redact_keys parameter allows you to specify custom keys that should be redacted beyond the default sensitive keys (api_key, auth_headers, authorization).